Basement Stairs Worth Actually Noticing
Most people treat basement stairs like a back hallway, functional, forgettable, and basically invisible. You walk up and down them a dozen times a day without really seeing them, and when guests come over, nobody thinks to mention the staircase at all. But here is the thing: your basement stairs are one of the most used architectural features in your entire home, and they are usually one of the last things to get any real design attention.
That is starting to change. More homeowners are finishing their basements and turning them into proper living spaces, and as that shift happens, the stairs connecting the main floor to the lower level are finally getting their due. A well-designed staircase does not just look good. It sets the tone for everything below. When you walk down a stairway with good lighting, a solid railing, and thoughtful finishes, you arrive at the basement feeling like you are entering a real room, not a storage pit.
Whether you are doing a full renovation or just looking for smart ways to refresh what you already have, there are so many directions you can take. From structural overhauls like open-riser floating stairs to simple styling updates like a painted riser pattern or a gallery wall alongside the steps, the options are genuinely exciting. This collection covers all kinds of budgets, styles, and approaches so you can find ideas that actually fit your home and your life.
You do not need to do everything at once. Sometimes just one well-chosen change, whether that is better lighting, a new railing finish, or a fresh coat of paint on the risers, is enough to make the whole stairway feel intentional and pulled together. Start where it makes sense for you, and let the space evolve from there.
Structural Statements Worth the Investment
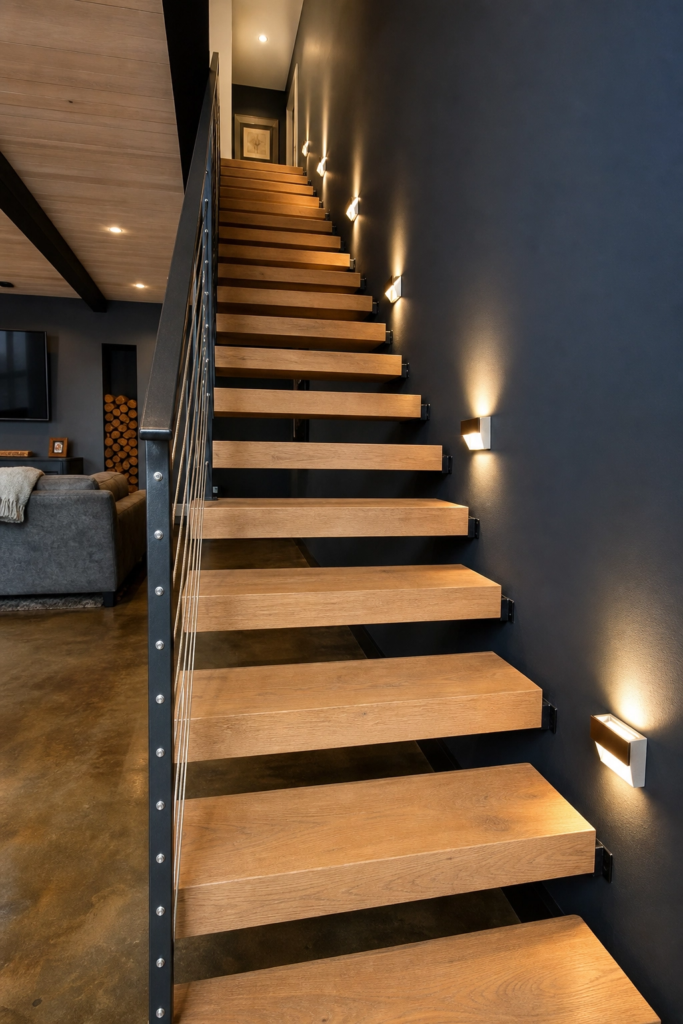
1. Open-Riser Floating Stairs
If your basement renovation has a modern, clean-lined aesthetic, open-riser floating stairs are one of the most visually striking things you can do with the staircase. The concept is simple: instead of solid risers connecting each tread, there is open space between each step, which makes the whole structure feel lighter and almost sculptural. Thick solid wood treads, usually in white oak, walnut, or pine depending on your budget, are the star of the show here. The floating effect works particularly well when paired with a wall-mounted steel or cable railing that does not interrupt the visual openness.
From a practical standpoint, open risers work best when your basement is a finished, actively used living space. They allow light and air to pass through the staircase, which helps the lower level feel connected to the floor above rather than sealed off. The surrounding wall can be painted a deep charcoal or warm white to create contrast with the wood tones. Consider directional wall sconces at the side of every two or three steps for both safety and atmosphere. The overall cost is higher than a standard staircase replacement, but the payoff in terms of visual impact is significant and long lasting.
Designer Note: If you have kids or pets, you can still pull off open risers by choosing balusters with minimal spacing, or by adding a low-profile mesh panel behind the railing for safety without sacrificing the open look.
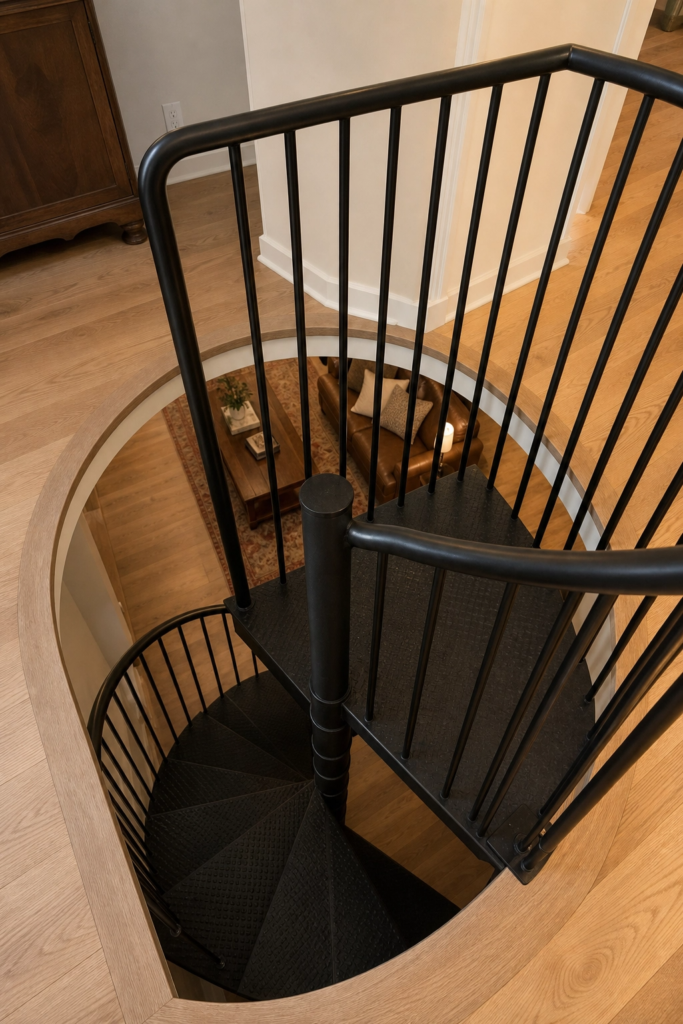
2. Spiral Staircase for Tight Spaces
A spiral staircase is one of the best options when space is genuinely limited. Standard straight stairs need a significant footprint to meet code requirements, but a well-designed spiral can do the job in a fraction of the floor space. The visual appeal is real too. A metal spiral in matte black with simple steel treads has a very contemporary industrial look. A wooden spiral with turned spindles and a smooth handrail brings something warmer and more classic. Either way, the spiral form is inherently architectural, and it becomes a focal point rather than just a passageway.
You will want to think carefully about how often you carry things up and down before committing to a spiral. It is not the most practical choice for hauling laundry baskets or furniture. But for a basement that is primarily a media room, home office, or guest suite where traffic is lighter and the focus is on the experience of moving through the space, a spiral staircase is a genuinely smart and stylish choice. Powder-coated steel versions in black, white, or bronze are available at a mid-range price point, and many are sold as kits that can be installed without major structural work.
Designer Note: Make sure overhead clearance is adequate before installing a spiral. Many older homes have lower ceiling heights near the basement opening, which can make the spiral feel cramped at the top of the rotation.
3. L-Shaped Staircase with a Landing
An L-shaped staircase with a landing is a great middle ground between a straight run and something more architectural. The landing provides a natural pause in the descent, which gives the staircase a sense of rhythm and intention. It also makes the trip up and down feel less steep, which is especially helpful if your basement stairs currently feel like a near-vertical drop. The landing can be put to work in multiple ways. A small built-in bench with storage underneath is practical and charming. A potted plant, a piece of wall art, or a small console table gives the landing a moment of personality.
In terms of materials, the landing is a great place to introduce a slightly different flooring material than the stair treads. If the treads are hardwood, consider a painted checkerboard or patterned tile on the landing. It breaks the visual repetition and makes the whole staircase feel more considered. For the walls flanking the L-turn, a bold accent color or a textured wallpaper creates a backdrop that you only fully see from the right angle, which gives the staircase a bit of a reveal quality.
Designer Note: L-shaped staircases typically require more structural planning than straight or spiral options. Work with a carpenter or contractor to confirm your home’s framing can accommodate the landing before committing to this design.

Railing and Baluster Upgrades That Change Everything
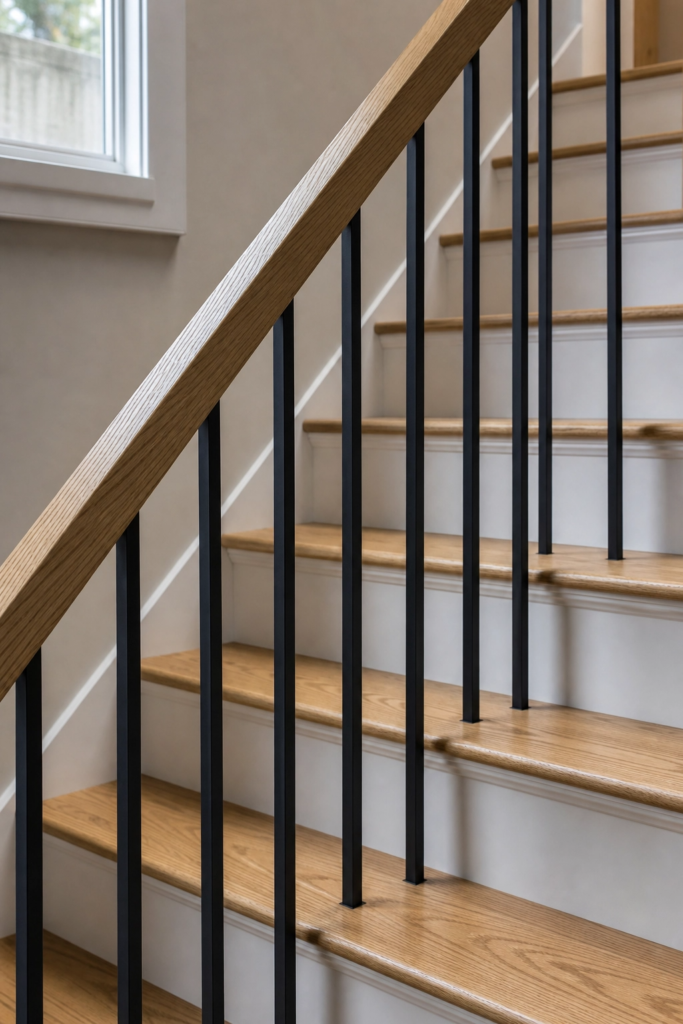
4. Black Metal Balusters with a Wood Handrail
This is the combination that has taken over new home builds and renovation projects for good reason. Matte black iron or steel balusters paired with a warm wood handrail are clean, modern, and versatile enough to work with almost any interior style. The contrast is satisfying in a way that feels current without being trendy, and the materials are durable enough to hold up to daily use without looking worn. You can find square balusters, twisted designs, and more minimal round-rod options depending on how much detail you want.
For the handrail, white oak and red oak are the most popular choices right now because they take stain beautifully and have a natural warmth that offsets the coolness of the black metal. A clear satin finish shows off the wood grain and keeps the look from feeling too rustic. The newel posts can either match the handrail in wood, or be painted to match the balusters for a more graphic, two-tone effect. On the wall side of the staircase, a matching wood handrail attached directly to the wall with simple black brackets ties the whole look together.
Designer Note: When replacing balusters, check your local building code for spacing requirements. Most codes require that balusters be spaced close enough that a 4-inch sphere cannot pass through, which matters especially if children will be using the stairs.
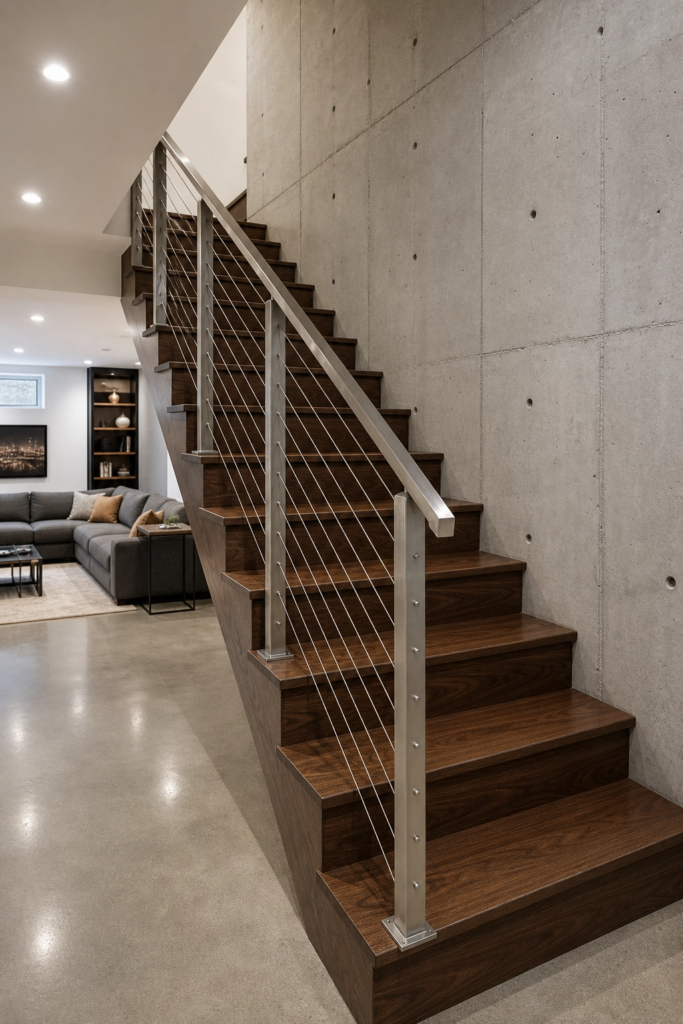
5. Cable Railing for a Modern, Airy Look
Cable railing systems use horizontal stainless steel cables threaded between posts, and the result is a railing that is nearly invisible from certain angles. This works especially well for open-concept basement spaces where you want to maintain sightlines from the staircase into the room below. The posts are typically metal, either stainless steel or powder-coated aluminum, and they can be wall-mounted or floor-mounted depending on your setup. The cables themselves do not require much maintenance and are remarkably strong.
One thing to think about with cable railing is the spacing of the posts. To keep the cables taut and within code compliance, posts generally need to be placed at intervals of no more than three to four feet. On longer runs, this is easy to manage, but on shorter staircases it may result in the posts dominating the look. The style reads as clean and architectural, and it pairs naturally with concrete floors, polished wood, and white or gray walls. It works less well in traditionally decorated spaces, where the material contrast can feel jarring.
Designer Note: Budget for tensioning hardware in addition to the cable and posts. Proper tensioning is what keeps cable railings looking crisp and prevents the horizontal lines from sagging over time.
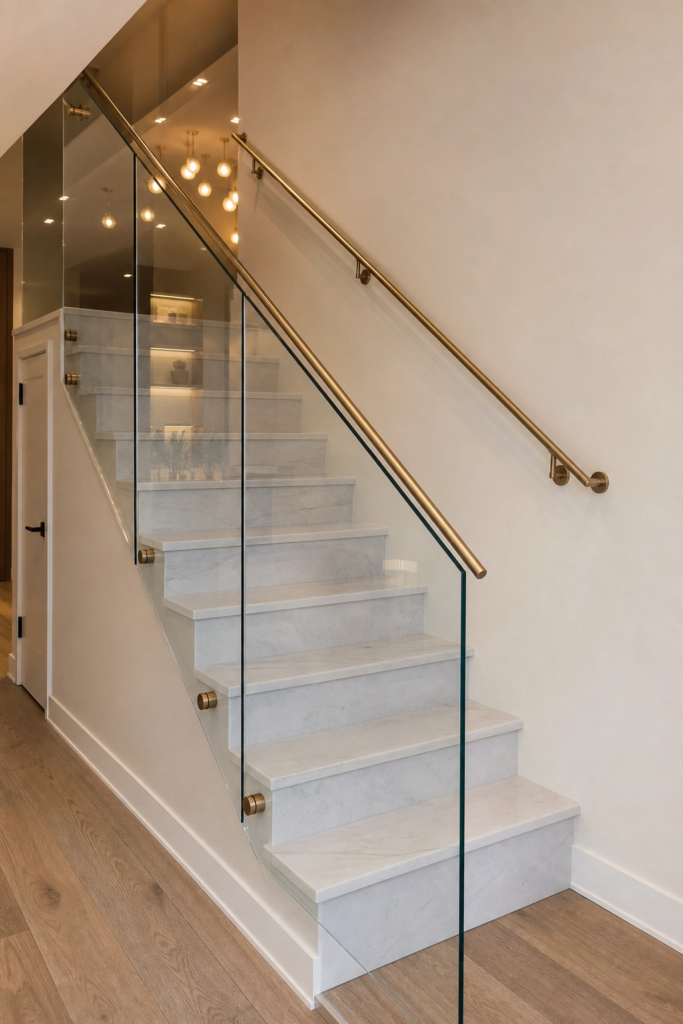
6. Glass Panel Railing
Tempered glass panels used as balustrade infill create the most visually open railing option available. Unlike balusters or cables, glass does not interrupt the view at all, which makes the staircase feel wide and uncluttered. This is a great choice for a basement staircase that opens directly into a family room or living area, because it keeps both levels visually connected. Frameless glass panels mounted with standoff hardware look the most minimal. Framed glass with thin aluminum or steel channels is a bit more cost-effective and still looks very polished.
The practical upside of glass railing is that it reflects light and makes a space feel larger. The downside is maintenance: fingerprints and smudges are visible, so you will need to clean the panels regularly, especially if kids are in the home. Clear glass is the most common choice, but lightly frosted panels are an option for a softer look that hides smudging better. Pair glass railing with a simple round or oval handrail in wood or brushed metal. Avoid ornate handrails, which fight with the clean geometry of the glass.
Designer Note: Always use tempered or laminated safety glass for any railing application. Standard glass is not code-compliant and is a safety hazard if broken. Tempered glass is designed to break into small, relatively harmless pieces rather than sharp shards.
Paint, Pattern, and Surface Ideas
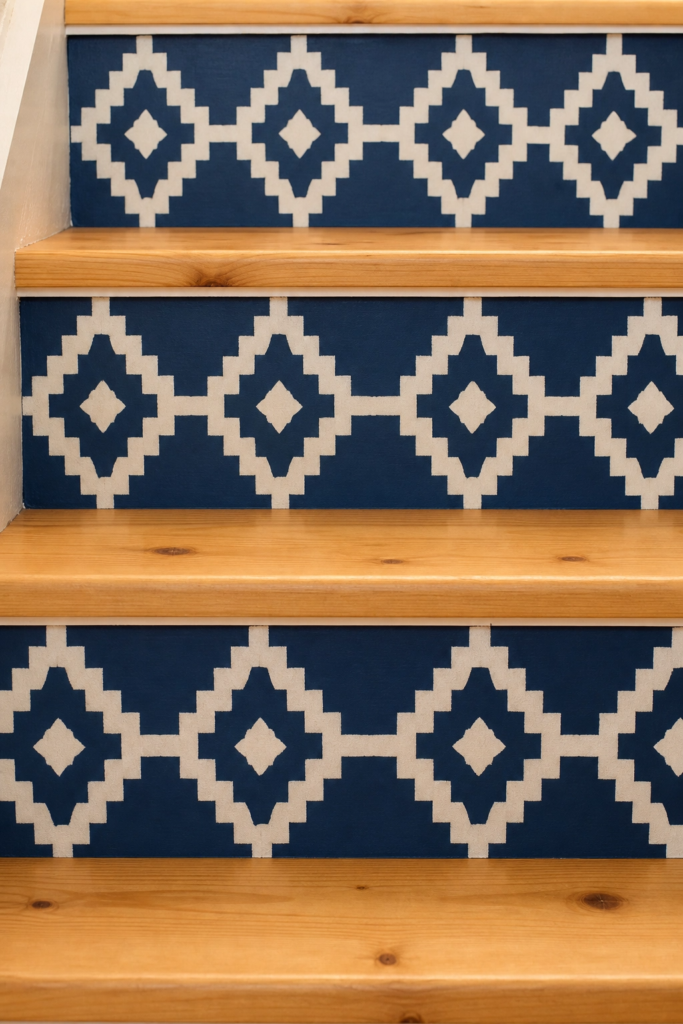
7. Painted Risers with a Stenciled Pattern
Painting the risers of your basement stairs is one of the most affordable and impactful things you can do without any structural changes at all. The treads stay natural wood or get sanded and sealed, while the risers (the vertical face of each step) get painted. A solid color on the risers, like navy, forest green, or even a warm terracotta, creates a bold stripe effect when you look down the staircase. A stenciled pattern takes it further, with geometric shapes, a Moroccan tile motif, or a floral repeat that gives the stairs a handmade, intentional quality.
The key to making this look work is prep. The risers need to be clean, lightly sanded, and primed before you paint so the color adheres properly and does not chip off quickly underfoot. Use a porch or floor paint for durability, and apply at least two coats. If you are stenciling, spray adhesive on the back of the stencil keeps it flat against the surface while you work, which makes the edges much crisper. Finishing the treads with a clear satin polyurethane ties the whole look together and protects the wood from scuffs and moisture.
Designer Note: Limit your stencil palette to two or three colors for a cohesive result. Too many colors across the risers start to look chaotic rather than intentional, especially in a relatively narrow stairwell.
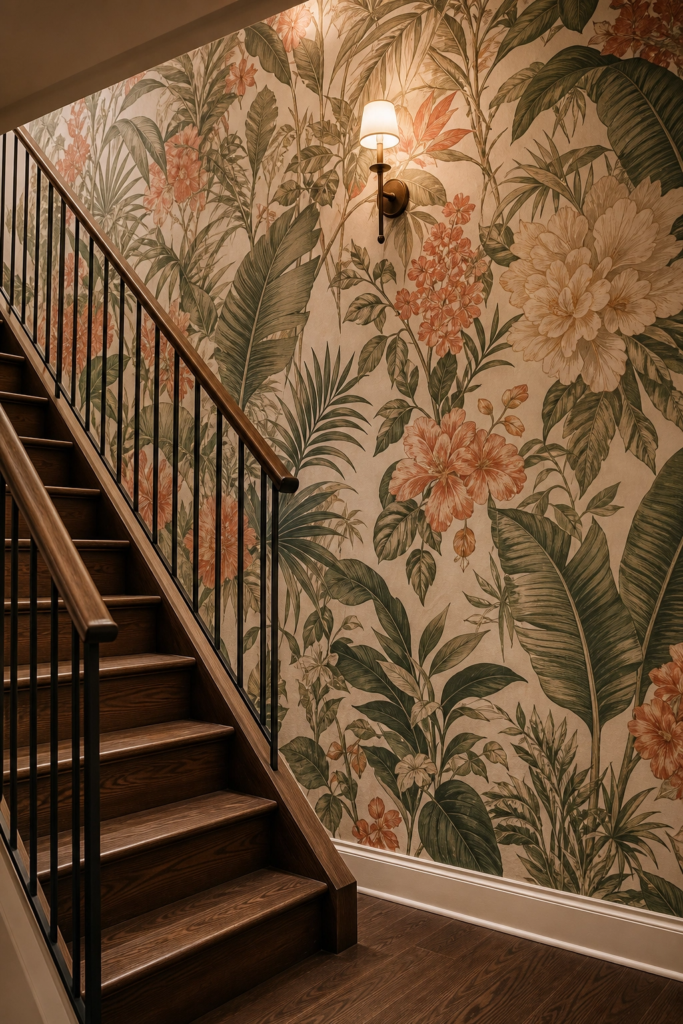
8. Wallpapered Stairwell Wall
The wall alongside a staircase is a long, angled surface that most people paint a single color and forget about. But it is actually one of the best places in the house for wallpaper because it gets seen from a distance, which is exactly the way graphic wallpaper is meant to be experienced. A large-scale botanical print in greens and neutrals brings a lush, garden-room quality to the stairwell. A geometric paper in navy and white reads more graphic and modern. A textured grasscloth or linen wallpaper adds warmth and depth without any pattern at all.
Hanging wallpaper on an angled stairwell wall is slightly more technical than papering a flat room wall because you need to cut each strip at the correct diagonal to follow the slope of the staircase. Many wallpaper installers charge a bit more for stair walls for this reason. If you are doing it yourself, take your time with the measurements and use a laser level to ensure the pattern stays aligned across strips. A removable peel-and-stick wallpaper is a good lower-commitment option if you want to try the look before investing in a traditional paste paper.
Designer Note: Keep the railing and balusters simple when you are wallpapering the stair wall. Ornate ironwork or heavily carved wood will compete with a busy pattern. Choose one element to be the focal point and let the other support it.
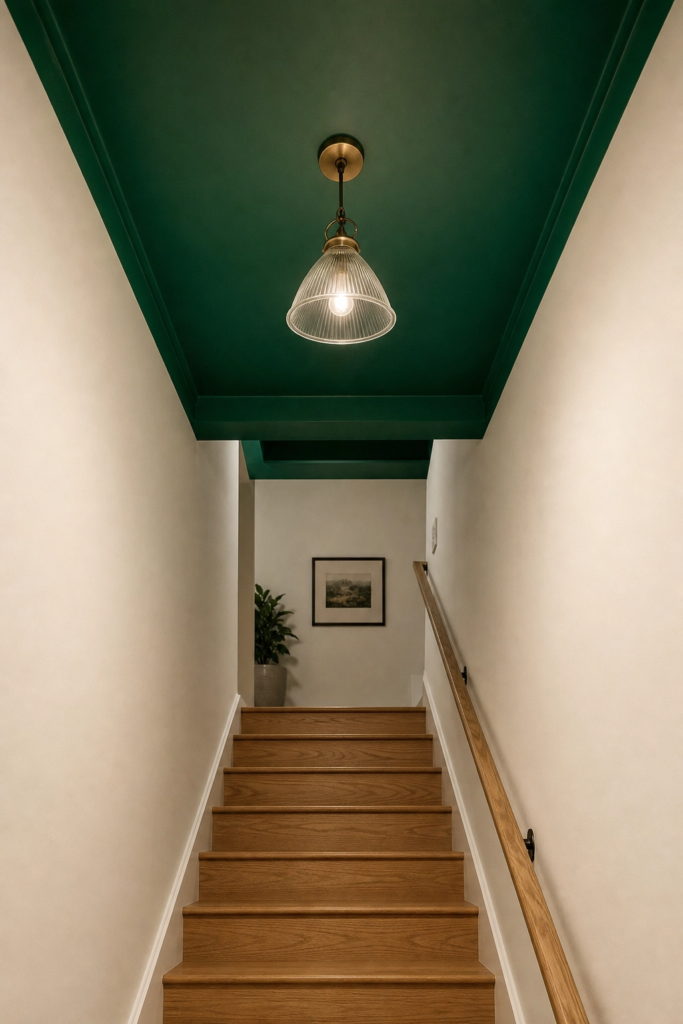
9. Bold Accent Color on the Stairwell Ceiling
The ceiling of a stairwell is almost always ignored, which is a genuine missed opportunity. Painting it a deep, saturated color is a low-cost way to add a sense of drama and enclosure to the space without touching the walls or treads. Inky navy, warm terracotta, rich emerald, and deep plum all work particularly well because they create a jewel-box effect when you are standing in the stairwell looking up or descending the stairs. The ceiling color does not need to match anything else in the room. In fact, it works better when it is its own moment.
This technique works especially well in stairwells that are partially enclosed, where the ceiling is clearly defined on all sides. If your staircase opens into the basement at the bottom with no defined ceiling overhead, the effect is less controlled. In those cases, you can paint just the soffit or the underside of the staircase structure itself in the accent color to get a similar punch. Use a flat or matte finish on ceilings to minimize brush and roller marks, and choose a color that is two or three shades deeper than your wall color for a naturally harmonious result.
Designer Note: Test your ceiling color in natural and artificial light before committing. Deep colors can shift dramatically depending on the light source, and what looks like a rich navy in the paint store can read nearly black under a single overhead fixture.
Lighting Ideas That Work Hard and Look Good
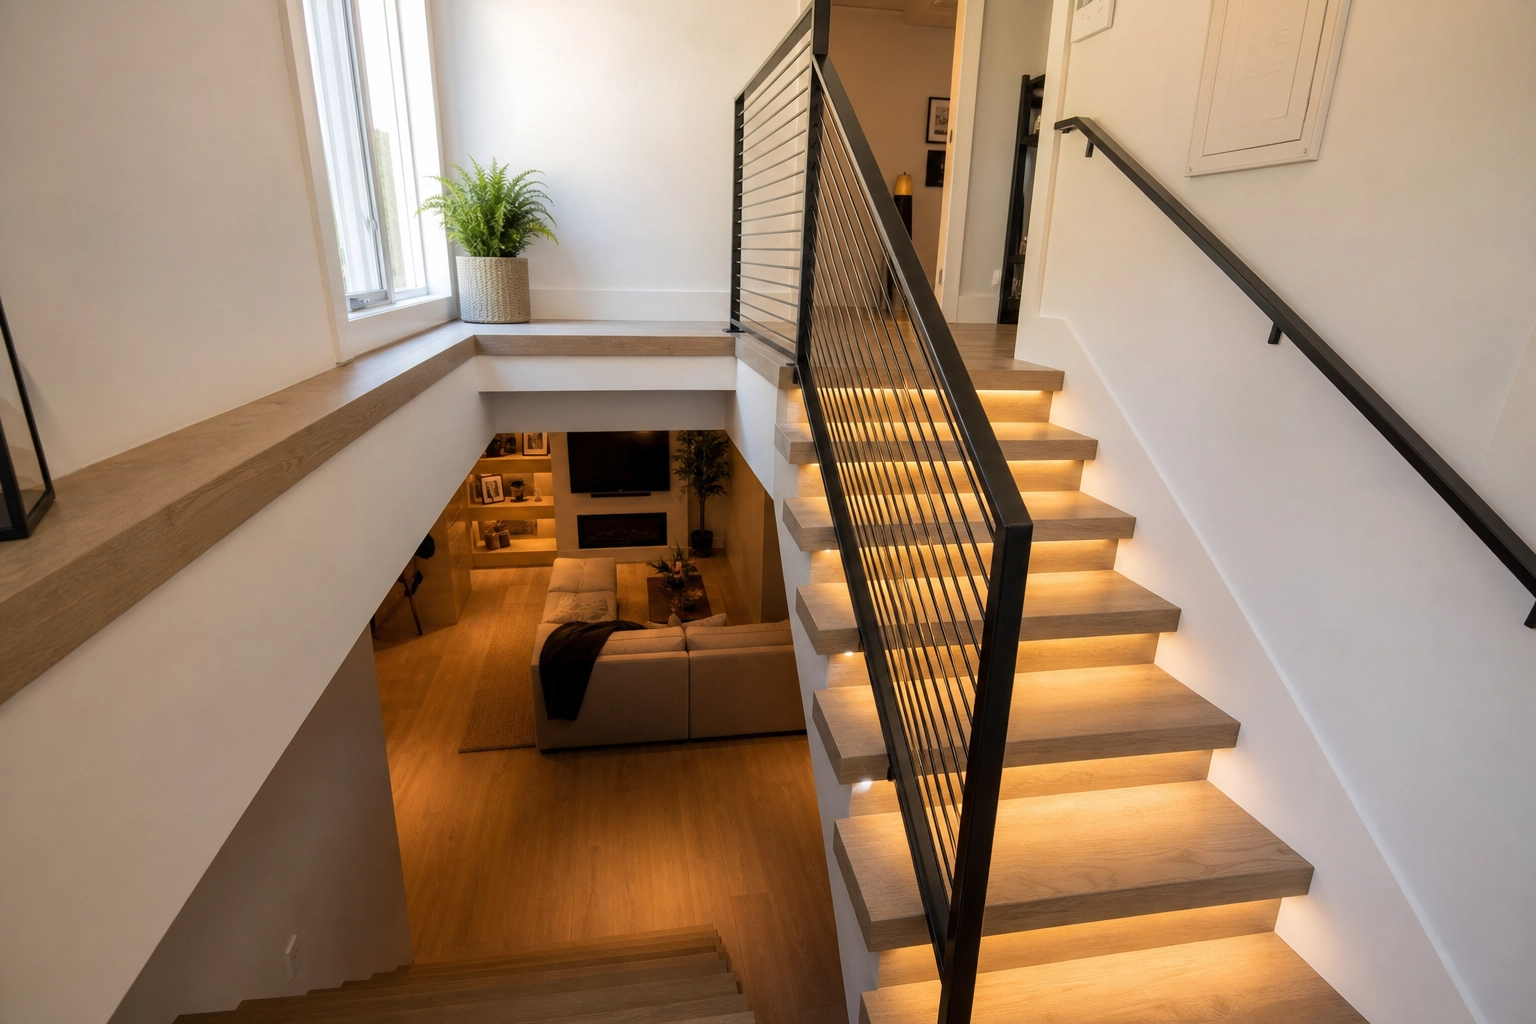
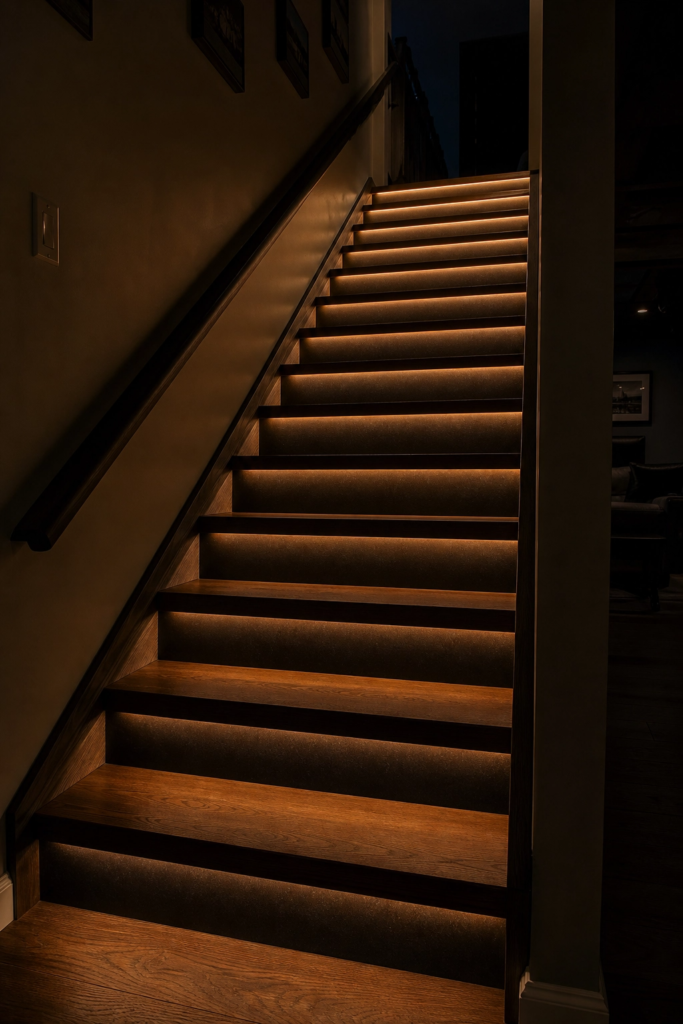
10. LED Strip Lights Under Each Tread
Recessed LED strip lighting installed along the underside of each stair nosing creates what interior designers call the floating effect, where the stairs appear to be lit from within. The practical benefit is safety: you can navigate the stairs at night without turning on the main stairwell light, which is especially helpful if your basement is used as a bedroom or home office where someone might be sleeping while others are moving around the house. The aesthetic benefit is that the stairs become a proper design feature after dark, glowing with a soft horizontal light that looks very intentional.
Warm white or soft neutral LEDs in the 2700 to 3000 Kelvin range feel most natural and home-like. Cool white LEDs can read harshly, especially in contrast to the warmer ambient light of the basement. RGB color-changing strips are a fun option for a media room or game room basement, where mood lighting is part of the experience. Installation requires routing the strips neatly along the underside of each tread and running the wiring discreetly to a single power source. Many systems are dimmable and can be controlled via a smart home app, which adds a nice layer of flexibility.
Designer Note: Choose a strip light with a high CRI rating (90 or above) for the most natural-looking light. Lower CRI strips can make skin tones and wood finishes look slightly off, which is noticeable in a high-traffic area like stairs.
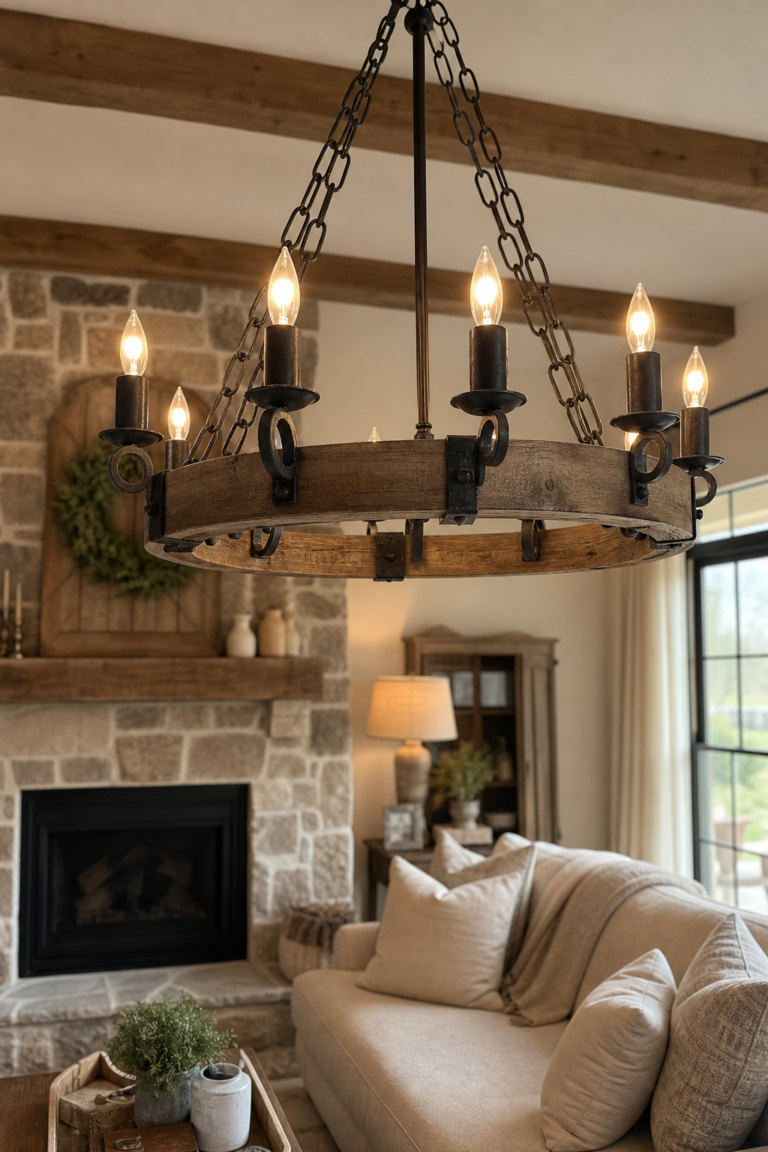
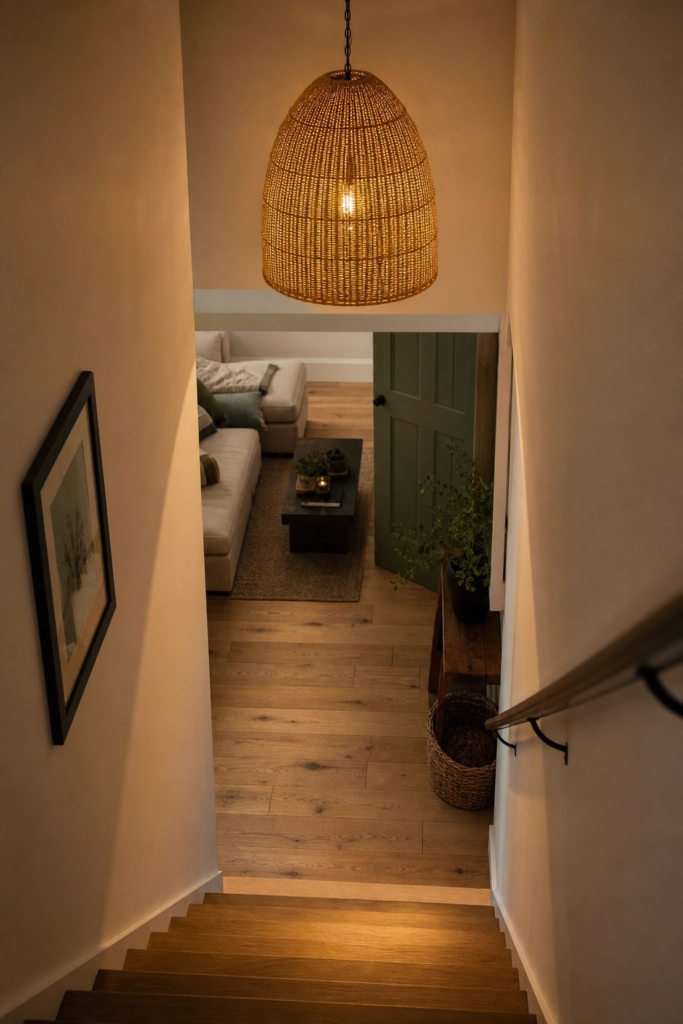
11. Pendant or Chandelier at the Base of the Stairs
Hanging a pendant or small chandelier at the base of the basement staircase is a move that people do not expect, which is exactly what makes it so effective. The fixture marks the arrival point at the bottom of the stairs and gives the basement entry a sense of occasion. A single oversized pendant in rattan, woven seagrass, or dark metal reads as warm and welcoming. A small cluster of globe pendants at varying heights creates something more playful and modern. A simple antique brass lantern-style fixture brings character and a slightly traditional quality that works in more classic interiors.
The key is to choose a fixture that is proportional to the ceiling height at the base of the stairs. If ceilings are low, a flush or semi-flush fixture is a better option than a pendant that hangs at head height. If you have a full 8-foot ceiling at the base, you have more room to play with. The fixture does not need to be expensive. Mid-range options from independent lighting retailers and online boutiques often have more character than big-box alternatives and cost a fraction of designer prices. Pair the fixture with a dimmer switch so you can adjust the light level from the upper floor.
Designer Note: Install the pendant on a switch that is accessible from both the top and bottom of the stairs so you are not walking up or down in the dark waiting to turn it off.
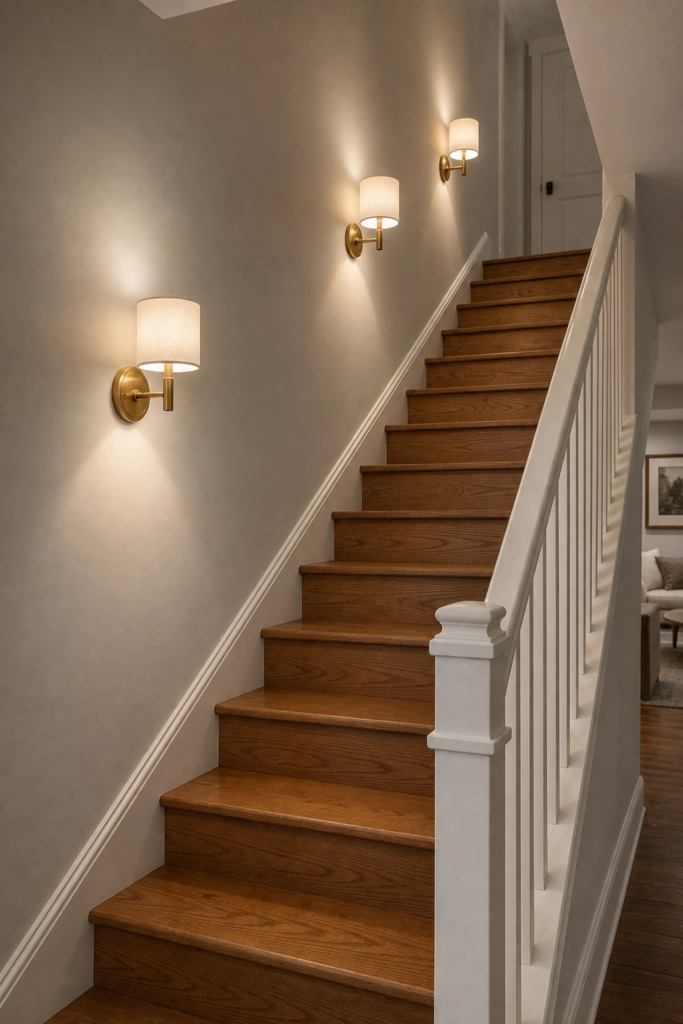
12. Wall Sconces Along the Stairwell
Wall sconces mounted along the stairwell wall provide layered, ambient lighting that feels much more considered than a single ceiling fixture blasting light down the shaft. They also serve as a design element in their own right. Black metal sconces in a simple cylindrical or cone shape work with modern and industrial styles. Brushed brass sconces with a white linen shade bring warmth and a slightly layered, collected quality. Ceramic sconces with a handmade finish are a more artistic option that adds texture to the wall.
Spacing matters a lot with stairwell sconces. Place them too far apart and the lighting becomes spotty. Space them too close and it can feel clinical. A general rule is to place one sconce every four to five steps, mounted at a height of about five feet from the tread below the sconce. Make sure all sconces are wired to the same switch circuit so you can control them all at once. If hardwiring is not feasible, plug-in sconces with a cord cover are a valid alternative that gives you the same look with a much simpler installation.
Designer Note: Use the same sconce model throughout the stairwell for a clean, cohesive look. Mixing different sconce styles on a single staircase can feel cluttered rather than eclectic.
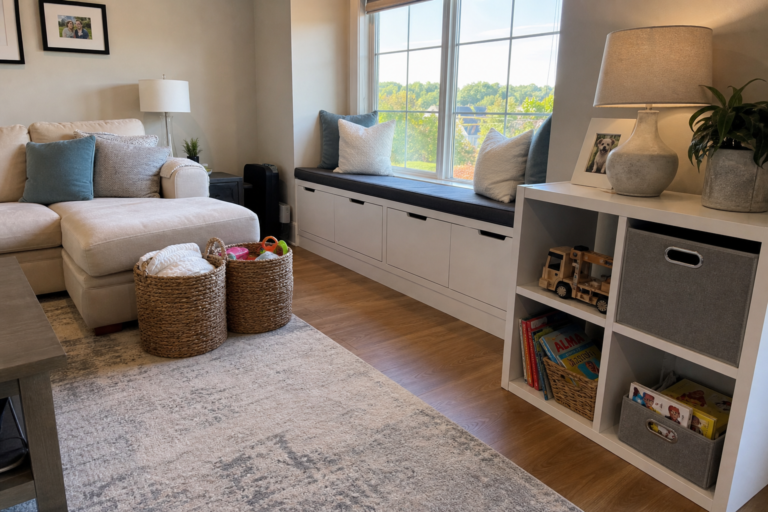
Storage and Built-In Ideas Below the Stairs
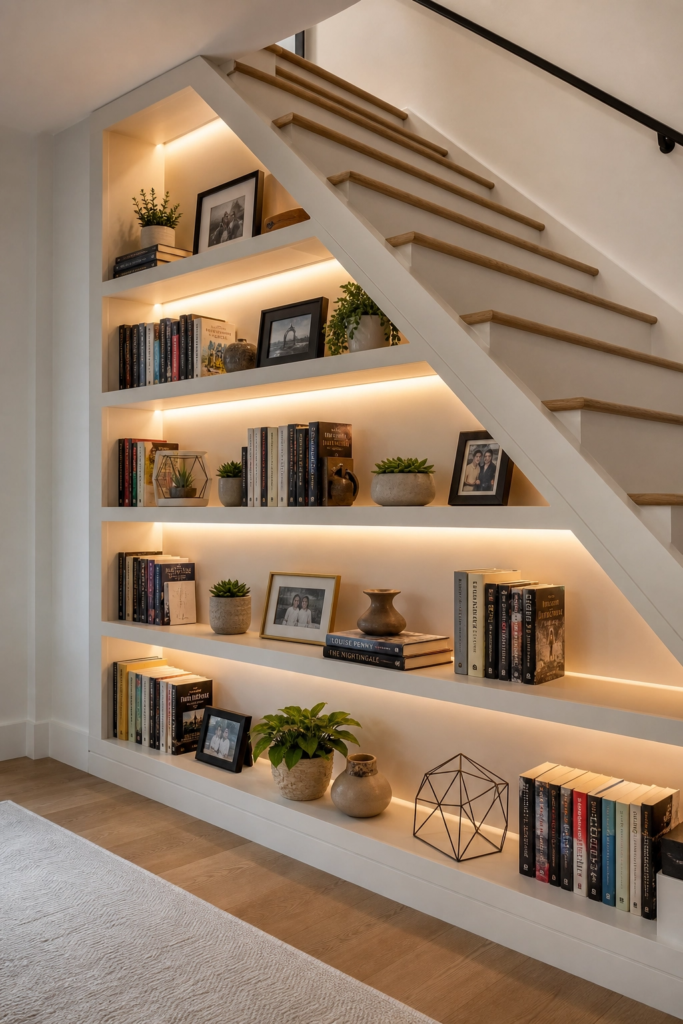
13. Built-In Bookshelves Under the Stair
The triangular space underneath a basement staircase is some of the most squandered square footage in the average home. A built-in bookshelf that follows the angle of the underside of the staircase turns dead space into a genuinely functional and visually satisfying feature. The shelves can be open or closed with cabinet fronts, depending on whether you want to display books and objects or store things out of sight. Open shelving with a mix of books, small framed photos, potted plants, and decorative objects creates an informal home library quality that makes the space feel lived in and personal.
The materials for the built-in should match or coordinate with the stair treads and any nearby furniture. If the stairs are white oak, simple white-painted cabinet boxes with open shelves feel cohesive. If the stairs are painted, you can use painted MDF for the shelves, which keeps costs reasonable. Adding interior lighting inside the shelving, either a small recessed fixture or a simple LED tape light along the back wall, makes the display feel more intentional and helps the area read as a purposeful design element rather than a storage solution that happened to be nearby.
Designer Note: Build the tallest section of shelving first and work down to match the slope of the staircase. Trying to retrofit shelves into an existing understairs space is much harder when the dimensions are not planned from the beginning.
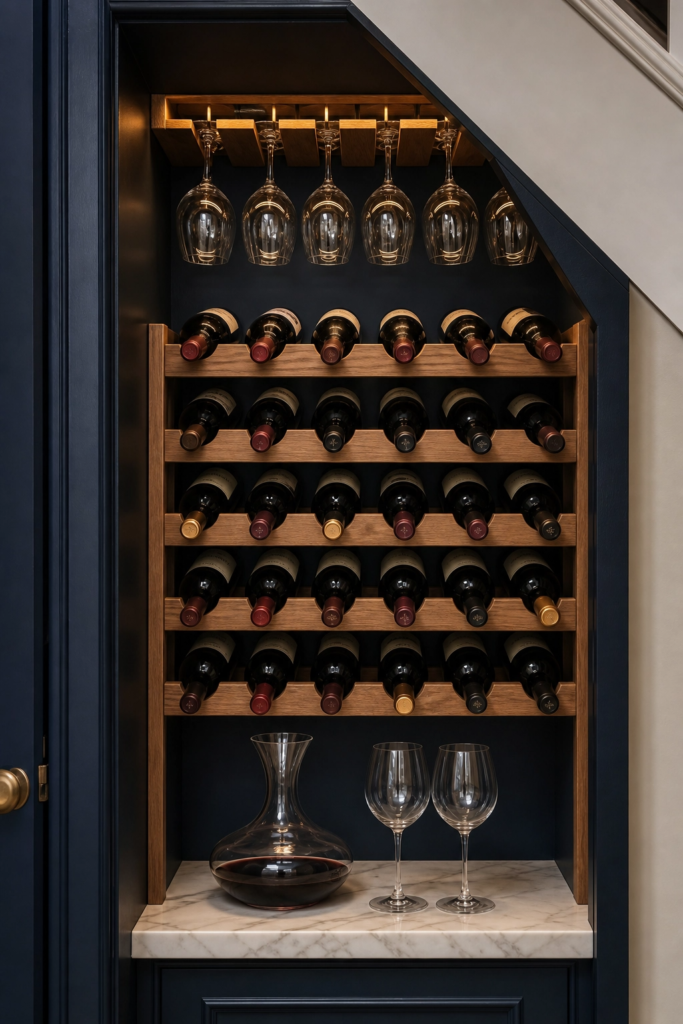
14. Understairs Wine or Drink Storage
If your basement includes a bar area, media room, or entertaining space, converting the understairs cavity into a wine or drink storage nook is a practical and appealing idea. A simple wine rack system installed into the triangular space can hold dozens of bottles without taking up any additional floor area. Add a small low-wattage LED strip along the top of the nook to illuminate the bottles from above, and the whole area becomes a feature worth showing off. For non-wine households, the same space works for a mini-fridge, a collection of barware, or a dedicated beverage station with open shelves above for glasses and a small prep surface below.
The nook works best with a clear visual boundary. Framing the opening with simple wood trim, painting the interior a contrasting color to the walls, or adding a small door that closes flush with the wall gives the space a finished, intentional feel. If moisture is a concern in your basement, proper insulation and a dehumidifier in the space will protect the wine and prevent the wood from swelling. For a bar setup, adding a small sink connection to the nook is possible if the plumbing can be routed nearby, which makes the whole setup genuinely functional.
Designer Note: Keep the interior of the wine nook a consistent dark color, like charcoal, navy, or forest green, which makes the bottles stand out visually and also hides the occasional smudge or drip that comes with storing wine.
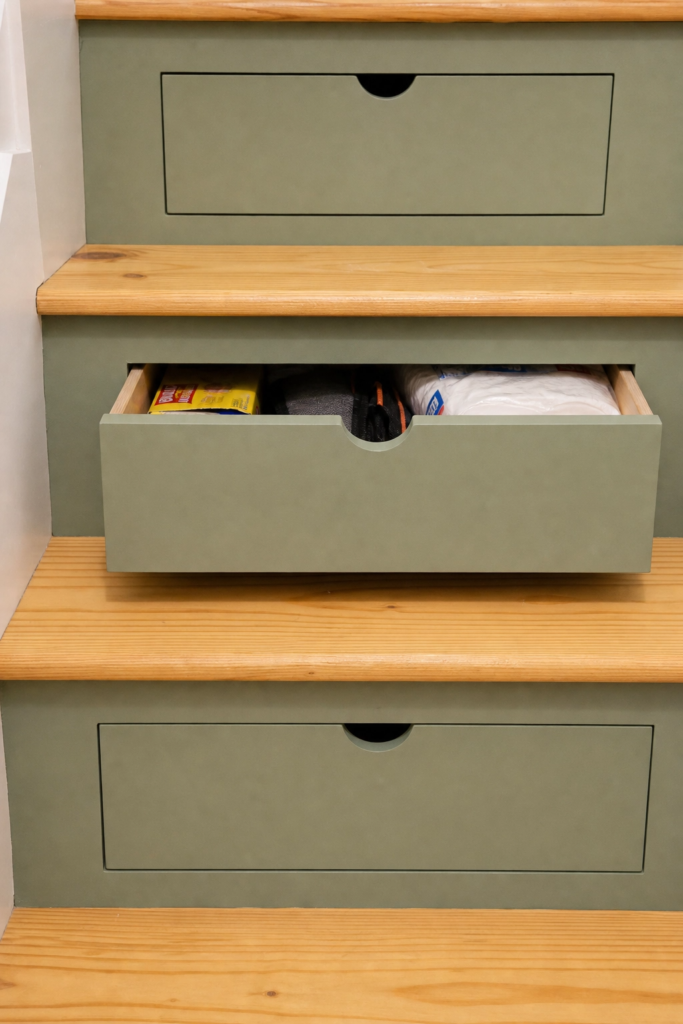
15. Drawers Built Into the Stair Risers
Pull-out drawers built into the risers of a basement staircase are a genuinely clever use of space that is more accessible than the understairs cavity. Each riser can conceal a shallow drawer that pulls out toward you, which is perfect for storing small items like shoes, tools, extra cords and chargers, board games, or cleaning supplies. The drawers do not need to be deep to be useful. Even a few inches of pull-out space per riser adds up across a full flight of stairs, and the flat face of the drawer front blends seamlessly into the stair so the feature is invisible when the drawers are closed.
The aesthetic opportunity here is also worth thinking about. The drawer fronts can be painted to match the riser color for a seamless, nearly hidden look. Or they can be finished in a contrasting material, like wood veneer on painted stairs, for a subtle detail that reveals itself only when you know where to look. Simple finger-pull hardware or push-to-open mechanisms keep the drawer fronts clean and hardware-free. This works best on a closed-riser staircase where the riser face is solid. Open-riser stairs do not have the surface area to accommodate drawers, but every other design approach is fair game.
Designer Note: Ask a cabinet maker or carpenter rather than a general contractor if you want this built properly. The drawer slides need to be mounted correctly within the structural depth of each riser, which requires precision that goes beyond basic carpentry.
Decorative Finishes and Styling Ideas
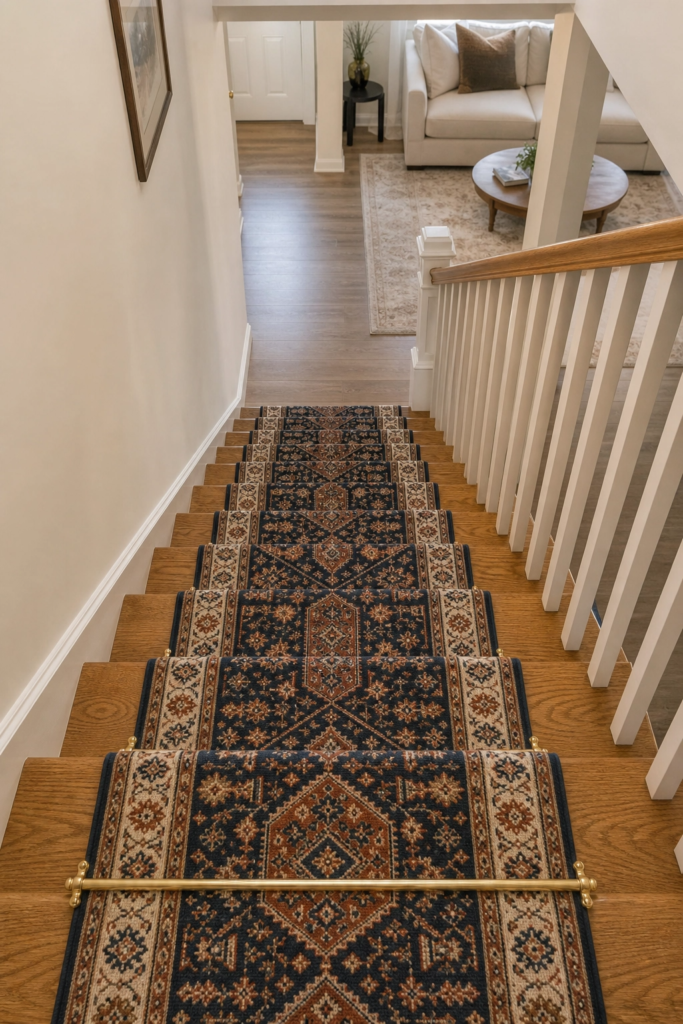
16. Stair Runner with a Printed Pattern
A stair runner is a strip of carpet or woven fabric that runs down the center of the staircase, leaving the sides of the treads exposed. It adds warmth, reduces noise, and provides grip underfoot. For basement stairs, which can be hard surfaces like painted wood or concrete, a runner changes the feel of the entire staircase. A printed or woven pattern, such as a classic Persian-style border design, a bold stripe, or a graphic diamond repeat, adds visual interest that a solid runner simply cannot match. Neutral backgrounds with pattern in navy, rust, and ivory are the most versatile choices.
Stair runners are typically sold by the foot and cut to length, then secured with carpet rods at the base of each riser or staple-gunned tightly into the joint between tread and riser. Carpet rods are the more traditional and reversible option, which is useful if you ever want to change the runner or restore the wood underneath. For a basement staircase that gets moderate traffic, a flatwoven wool or synthetic runner in a mid-pile weight is practical and easy to clean. Avoid very light colors on high-traffic stairs, as they show dirt quickly no matter the material.
Designer Note: Leave at least two to three inches of bare tread visible on both sides of the runner for a balanced, proportional look. A runner that is too wide for the stair reads as wall-to-wall carpeting rather than a deliberate design choice.
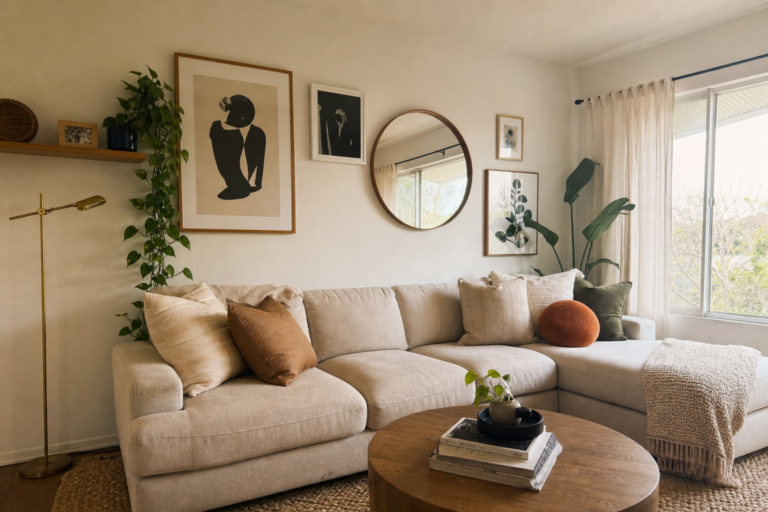
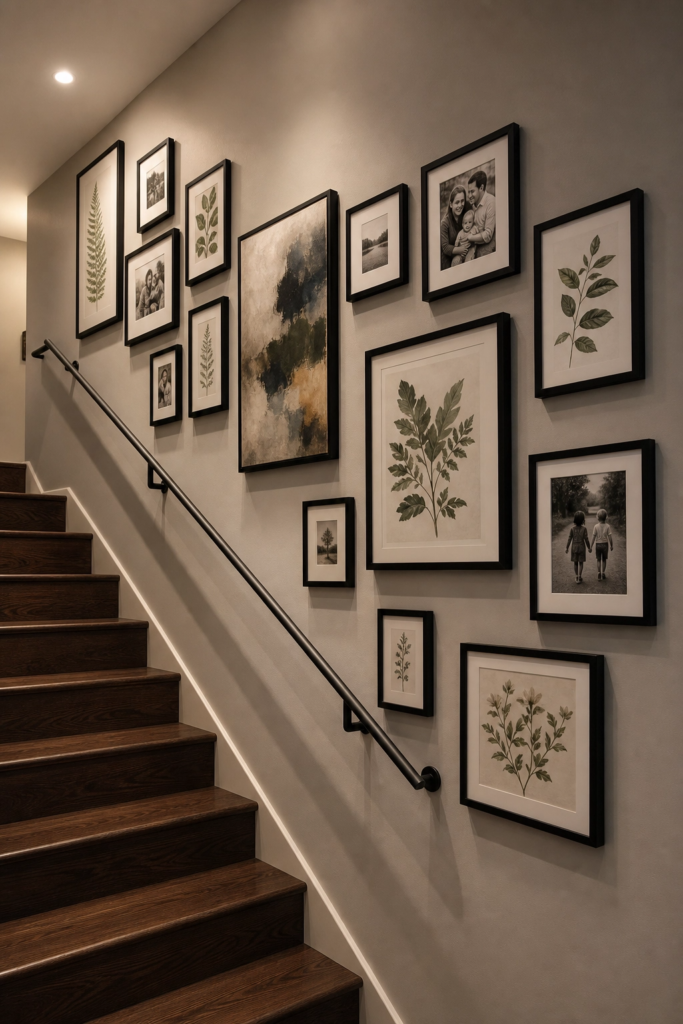
17. Gallery Wall Along the Staircase
A gallery wall climbing the stair wall is a classic for good reason. It takes a long, angled surface that would otherwise just be paint and turns it into something that tells a story. For a basement staircase, the gallery wall does not need to be formal or precious. A collection of framed family photos, vintage travel posters, botanical illustrations, abstract prints, or a mix of all of them can work beautifully when they share a consistent frame color. Black frames with a white mat are the most graphic and flexible. Natural wood frames feel warmer and more relaxed.
The trick to making a gallery wall work on a staircase is following the slope of the stairs with the overall arrangement. The center line of the arrangement should be parallel to the handrail, running diagonally up the wall. Start by laying out all the frames on the floor to test the arrangement before you put a single nail in the wall. Vary the frame sizes to keep it from feeling too rigid, and leave consistent spacing between frames throughout. Around 2 to 3 inches of space between frames is readable and balanced without feeling crowded or loose.
Designer Note: Anchor your gallery wall with one or two larger pieces and fill in around them with smaller frames. Leading with many small frames of the same size tends to look scattered rather than composed.
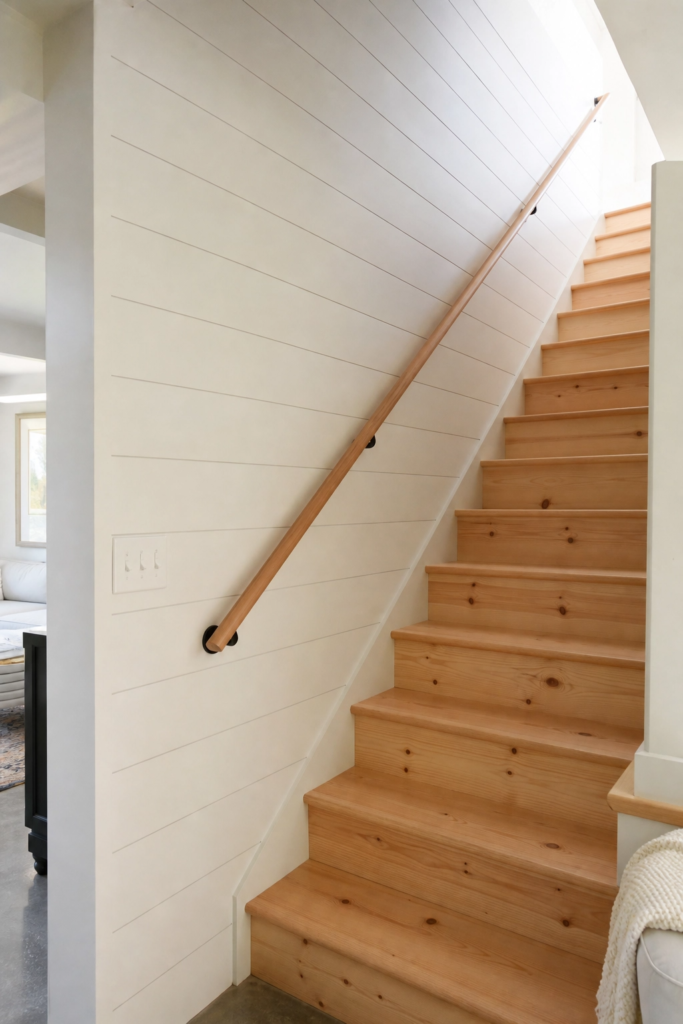
18. Shiplap or Wood Paneling on the Stairwell Wall
Installing shiplap or wood paneling on the wall alongside the basement staircase adds texture and architectural interest that paint alone cannot match. Horizontal shiplap painted a clean white or soft off-white brings a casual coastal quality to the space. Vertical V-groove paneling has a more cottage-like feeling. Raw or lightly stained wood planks create something warmer and more rustic. Whatever the orientation and finish, the paneling introduces depth and shadow lines that make the wall feel designed rather than just finished.
The stairwell wall is a relatively contained surface to panel, which makes it a manageable DIY project if you are comfortable with basic carpentry and a finish nailer. Pre-primed MDF shiplap is available at most home improvement stores and is more stable than solid wood in environments with variable humidity, which matters in a basement. After installation, the panels need to be caulked at the seams and top and bottom edges, primed, and painted for a professional result. Pair the paneled wall with a simple, clean handrail in contrasting material to let the texture of the paneling be the visual focus.
Designer Note: Paint the paneling and the adjacent wall the same color for a seamless, integrated look. Using two different colors on the paneling versus the plain wall above it tends to divide the stairwell visually rather than unifying it.
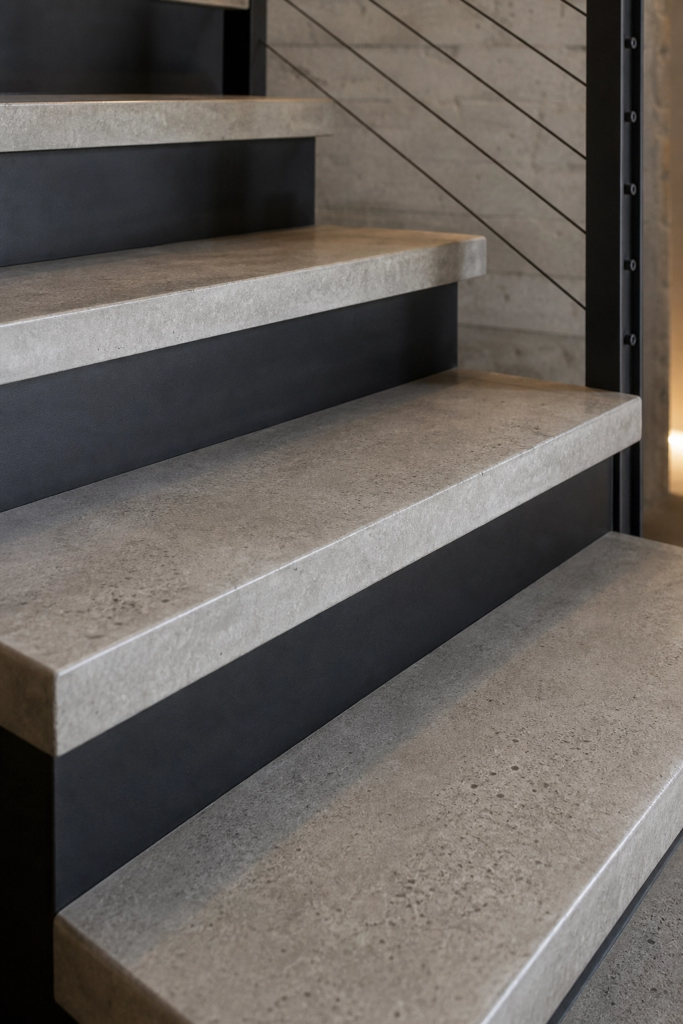
19. Concrete or Tile Treads for an Industrial Edge
Most basement stairs have wood treads, but concrete and tile are both legitimate and stylish alternatives for the right kind of space. Poured concrete treads are extremely durable, very much on-trend with current industrial and modern aesthetics, and relatively affordable if your basement renovation already involves concrete work. They pair naturally with steel railings, open-riser designs, and exposed ceiling elements like ductwork or wood beams. A sealer finish on the concrete keeps it from absorbing stains and makes it much easier to clean.
Large-format porcelain tile is another strong option for tread surfaces, particularly if you want the look of stone or concrete without the weight. Matte-finish tiles in a light gray, taupe, or warm ivory read as calm and contemporary. Make sure any tile used on treads has a good slip-resistance rating, which is measured as a coefficient of friction and is clearly labeled on commercial-grade tiles. The nosing of each tread, the front edge, should have a bullnose tile or a matching metal edge strip to protect the corner from chipping and to mark the edge of each step clearly for safety.
Designer Note: Add a small area rug or textured runner at the base of concrete or tiled stairs to ease the transition onto a harder surface and to add a moment of softness to what can otherwise feel like a very cool, material-heavy design.
20. Whitewashed or Limed Wood Treads
If you want the warmth of wood on your stair treads without the golden honey tone that standard pine and fir tend to bring, a whitewash or liming technique is a beautiful way to lighten the wood while keeping the grain visible. Whitewashing involves applying a diluted white paint or limewash product with a rag or brush, then wiping back the excess before it dries. The result is a pale, slightly weathered finish that reads as driftwood or Scandinavian farmhouse depending on the surrounding decor. The natural variation in the grain means each tread looks slightly different, which adds to the handmade quality.
Liming, which involves rubbing a white liming wax or paste into open-grain woods like oak or ash, produces a similar effect with a slightly more silver tone. Both techniques work best on unfinished or stripped wood treads. Existing treads that have a clear poly finish will need to be sanded back first so the finish can penetrate the grain properly. Seal the completed treads with a hard-wax oil or a clear matte poly designed for floors to protect the finish from foot traffic. Avoid glossy sealers, which will detract from the natural, understated quality of the whitewash.
Designer Note: Whitewashed treads are most impactful when the risers and walls are kept in warm whites or soft neutrals. Adding other pale tones around them lets the texture of the wood grain be the detail you notice rather than any color contrast.

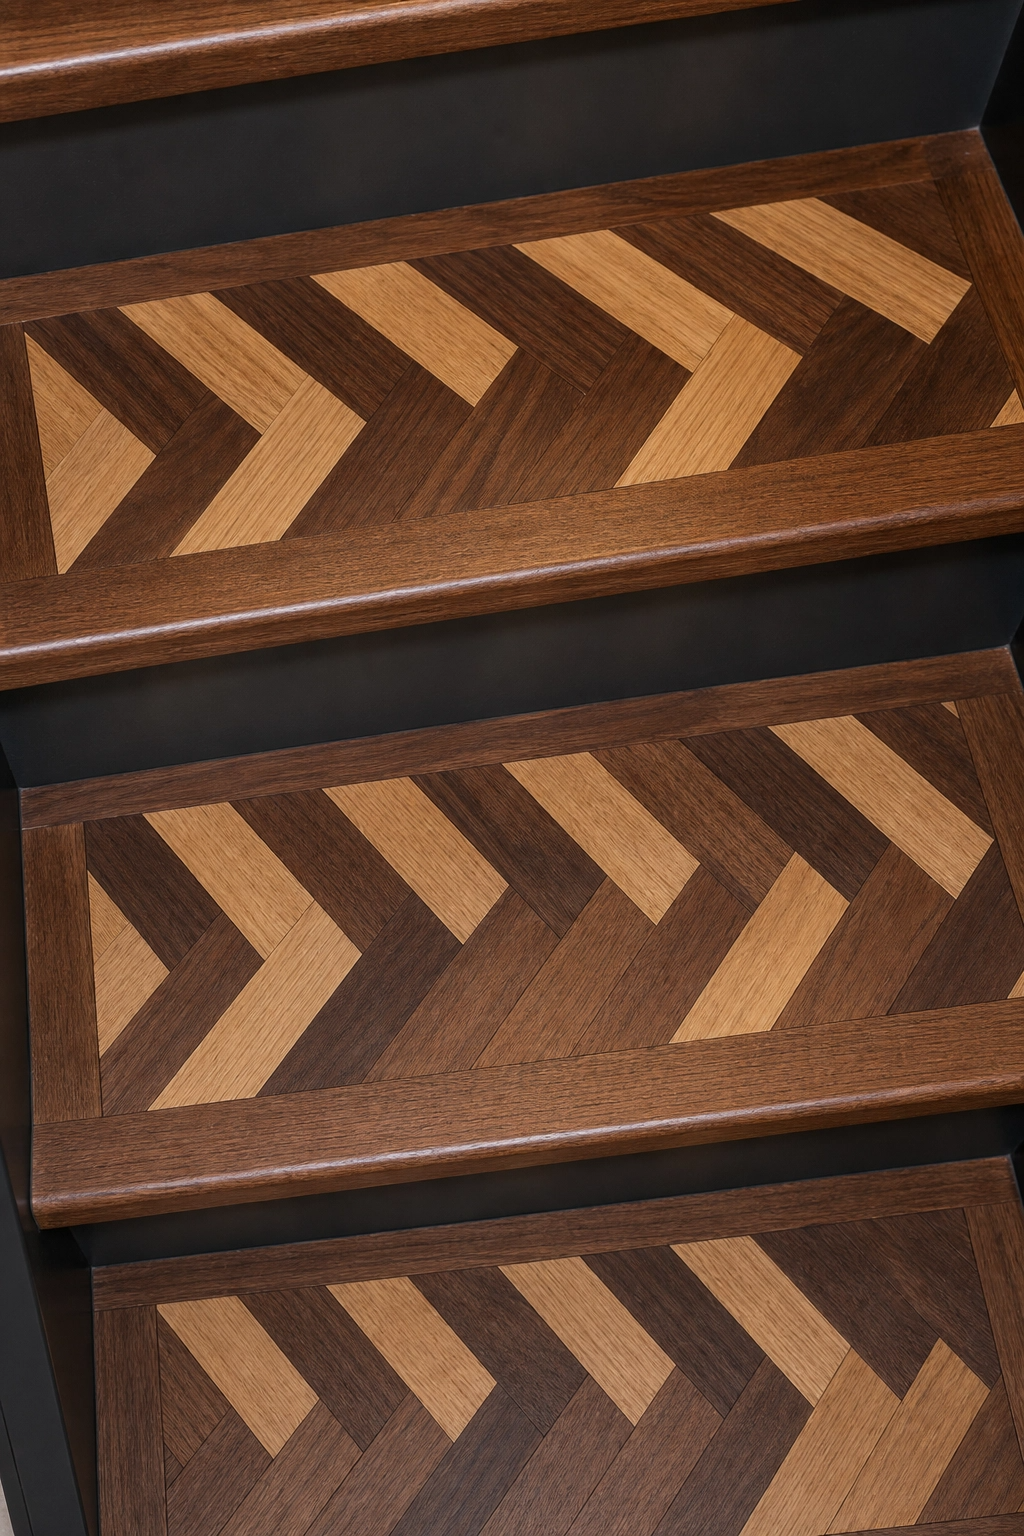
21. Herringbone Wood Tread Inlay
A herringbone pattern inlaid into the surface of each stair tread is a detail that signals real craftsmanship. The classic V-shaped interlocking pattern is traditionally associated with parquet flooring, and bringing it onto the stairs creates a visual connection between the staircase and any herringbone or parquet flooring in the basement below. The inlay is typically done with two complementary wood tones, a lighter and a darker variety, which makes the geometry of the pattern read clearly without being overwhelming. White oak and walnut is a particularly beautiful pairing.
This is not a DIY project for most people. The pieces need to be cut precisely and set into a tread surface that has been prepared to accept the inlay flush without any raised edges that could catch a foot. A skilled woodworker or flooring specialist is the right person to execute this properly. The cost per tread is higher than standard wood treads, but the detail adds significant visual richness to the staircase and holds up well over time when properly sealed. The nosing of each tread should be a clean, solid piece in one of the two wood tones rather than continuing the pattern to the very edge, which keeps the step safe and the pattern legible.
Designer Note: Limit the herringbone inlay to the center portion of each tread rather than running it edge to edge. A border strip in the darker of the two wood tones around the perimeter of the tread frames the pattern beautifully and adds a furniture-quality detail to each step.
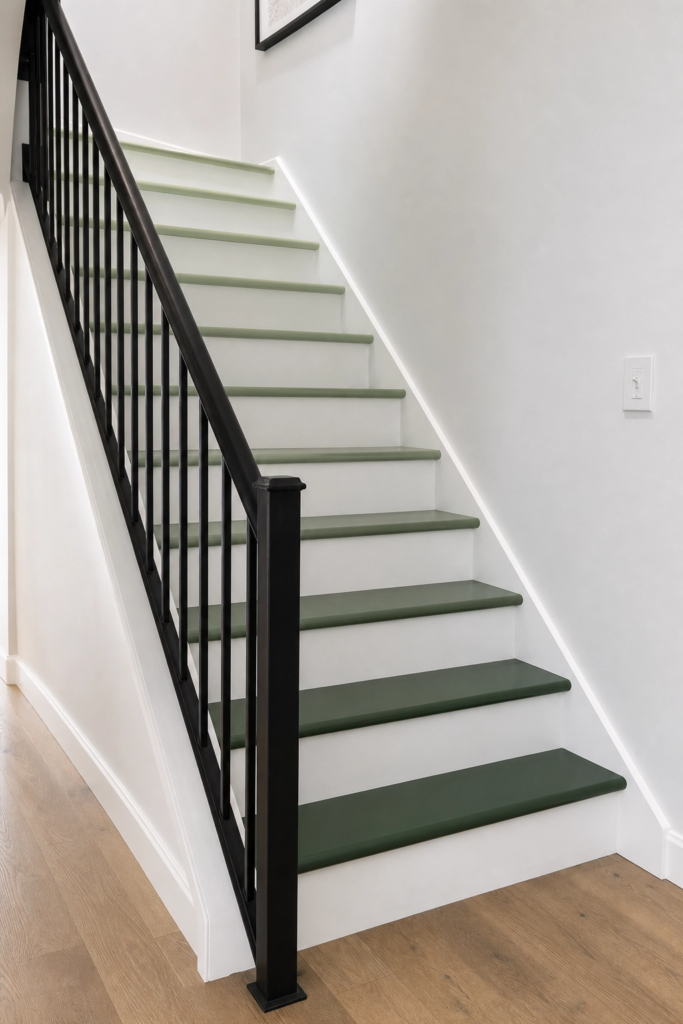
22. Painted Ombre Treads
An ombre paint effect applied across the treads of a basement staircase is one of those ideas that sounds unusual until you actually see it, at which point it makes perfect and obvious sense. The technique involves gradually transitioning from one paint color at the top of the staircase to a different color at the bottom, with each tread representing one step in the gradation. Lighter tones at the top transitioning to deeper tones at the bottom work well in basement stairwells because the lower level tends to be darker, and the ombre effect feels like a natural response to that shift in light.
The color families that work best for ombre treads are those with a clear progression: a soft blush to a deep mauve, a pale sage to a rich hunter green, or a warm cream to a deep terracotta. Stick within a single hue family for a cohesive result. Dramatic color jumps between treads look unintentional. The risers can remain white throughout to let the tread colors breathe without visual competition. Each tread needs at least two coats of floor-grade porch paint for durability, and the transitions between shades should be mixed intentionally if you are painting them yourself rather than relying on a clean line between pre-mixed colors.
Designer Note: Test your color sequence on paper or a digital tool before you commit to paint. Seeing the full progression from lightest to darkest all at once makes it much easier to spot where the gradient jumps too quickly or where a transition looks muddy.
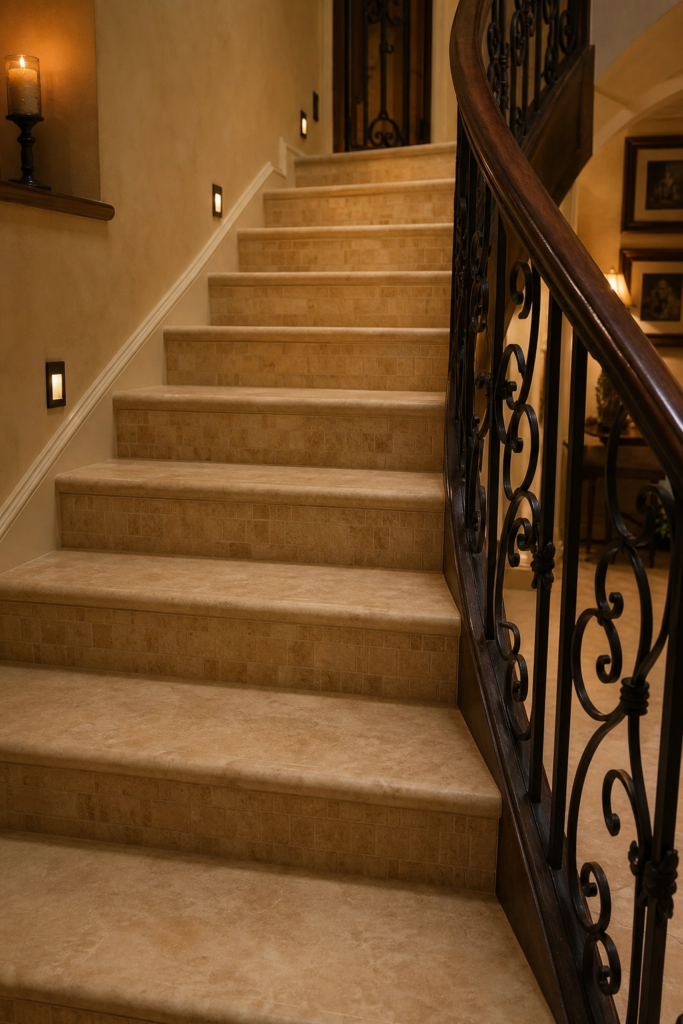
23. Natural Stone Tread Caps
Capping existing wood or concrete stair treads with a natural stone surface is an upgrade that brings an immediate sense of quality and permanence to the staircase. Slate, marble, travertine, and limestone are all popular options, each with its own personality. Slate in charcoal or rust brings a raw, earthy quality that works well in rustic or industrial basements. Marble treads in white with gray veining are much more formal and luxurious. Travertine in a warm cream tone has a classic Mediterranean warmth that pairs beautifully with wrought iron railings and warm ambient lighting.
Stone treads are heavier than wood and require the structural substrate beneath them to be solid and well-supported. They are also non-negotiably slippery when polished, so always choose a honed or brushed surface finish rather than a high-polish one for any tread surface. A strip of anti-slip tape or a matte anti-slip sealer applied along the front of each tread adds safety without altering the appearance of the stone significantly. The stone should be sealed on installation and resealed every few years depending on traffic levels. On the riser faces beneath each stone tread, paint or tile in a coordinating color completes the look without requiring the same investment as the treads themselves.
Designer Note: Order all your stone treads from the same quarry batch if possible. Natural stone varies between batches, and treads from different batches can have noticeably different color or veining patterns, which reads as mismatched rather than natural variation.
Final Thoughts
Basement stairs have a real opportunity to be more than just a way to get from one floor to another. They are a transition point, a daily experience, and in many homes, one of the most structurally visible features in the lower level. Taking the time to think through your staircase design, whether that means a full structural overhaul or a few well-chosen material upgrades, pays off in ways that go beyond aesthetics.
The best basement stair designs share a few things in common. They feel connected to the rest of the home, both the floor above and the basement below, without looking forced or contrived. They are safe and practical, with adequate lighting, secure railings, and tread surfaces that hold up to real use. And they have at least one detail that makes you notice them, whether that is the glow of LED strip lights at night, the texture of a stair runner, the warmth of whitewashed wood treads, or the drama of a painted ombre effect.
Start with what is most worn, most unsafe, or most visually distracting in your current staircase, and work from there. Small improvements compound quickly, and you do not have to spend a lot to make a real difference in how the space looks and feels. Whatever direction you go, the goal is a staircase you actually notice and appreciate rather than one you simply use.
Frequently Asked Questions
What is the best flooring material for basement stairs?
Hardwood treads are the most popular choice for finished basements because they are durable, easy to clean, and look good with a wide range of design styles. Solid hardwood can be refinished multiple times, which extends its lifespan considerably. For basements with moisture concerns, engineered hardwood or high-quality luxury vinyl treads are better options because they are more dimensionally stable in humid conditions. Tile and stone treads work well but require anti-slip finishes to be safe. Carpet or carpet treads are the softest and quietest option and are a good choice for homes with young children or elderly family members.
Do I need a permit to change my basement stairs?
It depends on the scope of the work and your local building code. Cosmetic changes like painting, adding a runner, or changing a railing finish generally do not require a permit. Structural changes, such as moving the staircase to a new position, widening the opening, or changing the rise and run dimensions, almost always require a permit because they affect the structural integrity of the floor and the code-compliance of the staircase. When in doubt, call your local building department and describe the project. They can tell you quickly whether a permit is required and what the inspection process looks like.
How can I make my basement stairs safer without a full renovation?
There are several simple improvements that make a meaningful difference in safety without major construction. Adding a wall-mounted handrail on the side opposite an existing railing gives everyone a second point of contact when going up or down. Non-slip stair treads or adhesive grip tape applied along the front of each tread provide traction on smooth or painted surfaces. Improving the lighting is also a high-impact safety improvement. A motion-activated light at the top or bottom of the stairs that illuminates automatically in the dark removes one of the most common causes of stair accidents, which is descending in low or absent light.
What is the minimum width for basement stairs?
Most residential building codes in North America require a minimum clear width of 36 inches for interior stairs, including basement stairs. This is measured between the handrail and the opposite wall, or between the two handrails if there are railings on both sides. Some local codes allow 30 to 32 inches for basement stairs in specific circumstances, but 36 inches is the standard minimum for comfortable and code-compliant use. If your basement stairs are narrower than this, it is worth speaking to a contractor about whether widening them is feasible, especially if the basement is a heavily used living space.
Can I install a railing on my own, or do I need a professional?
Installing a simple wall-mounted handrail is one of the more accessible DIY projects for a reasonably handy homeowner. The process involves locating studs, mounting the brackets, and attaching the rail. A full balustrade system with newel posts, balusters, and a handrail is more complex and requires accurate measurements, cutting, and secure anchoring at the base of each post. Most people with intermediate DIY skills can handle a standard wood balustrade kit with the help of detailed instructions. Cable and glass railing systems are more technical and generally benefit from professional installation to ensure the tension and anchoring meet safety standards.
How do I brighten a dark basement stairwell?
Dark stairwells are one of the most common basement complaints, and there are several ways to address them. Painting the walls and ceiling a light, reflective color like warm white or soft ivory bounces whatever light is available and makes the space feel significantly brighter. Adding wall sconces or under-tread LED strips introduces layered artificial light that feels more ambient and welcoming than a single harsh overhead fixture. If there is any opportunity to add a window or a small skylight above the stairwell, natural light is the most effective solution of all. Mirrored or glass railing panels also reflect light back into the stairwell and contribute to a brighter overall effect.