Most pantry organization falls apart within two weeks because the system does not match how you actually use the pantry. You buy a bunch of matching containers, spend a Saturday decanting everything, and by the following Wednesday the containers are half empty and the original bags are sitting next to them because nobody wanted to refill them. The ideas below are designed to stay organized because they work with real kitchen habits, not against them.
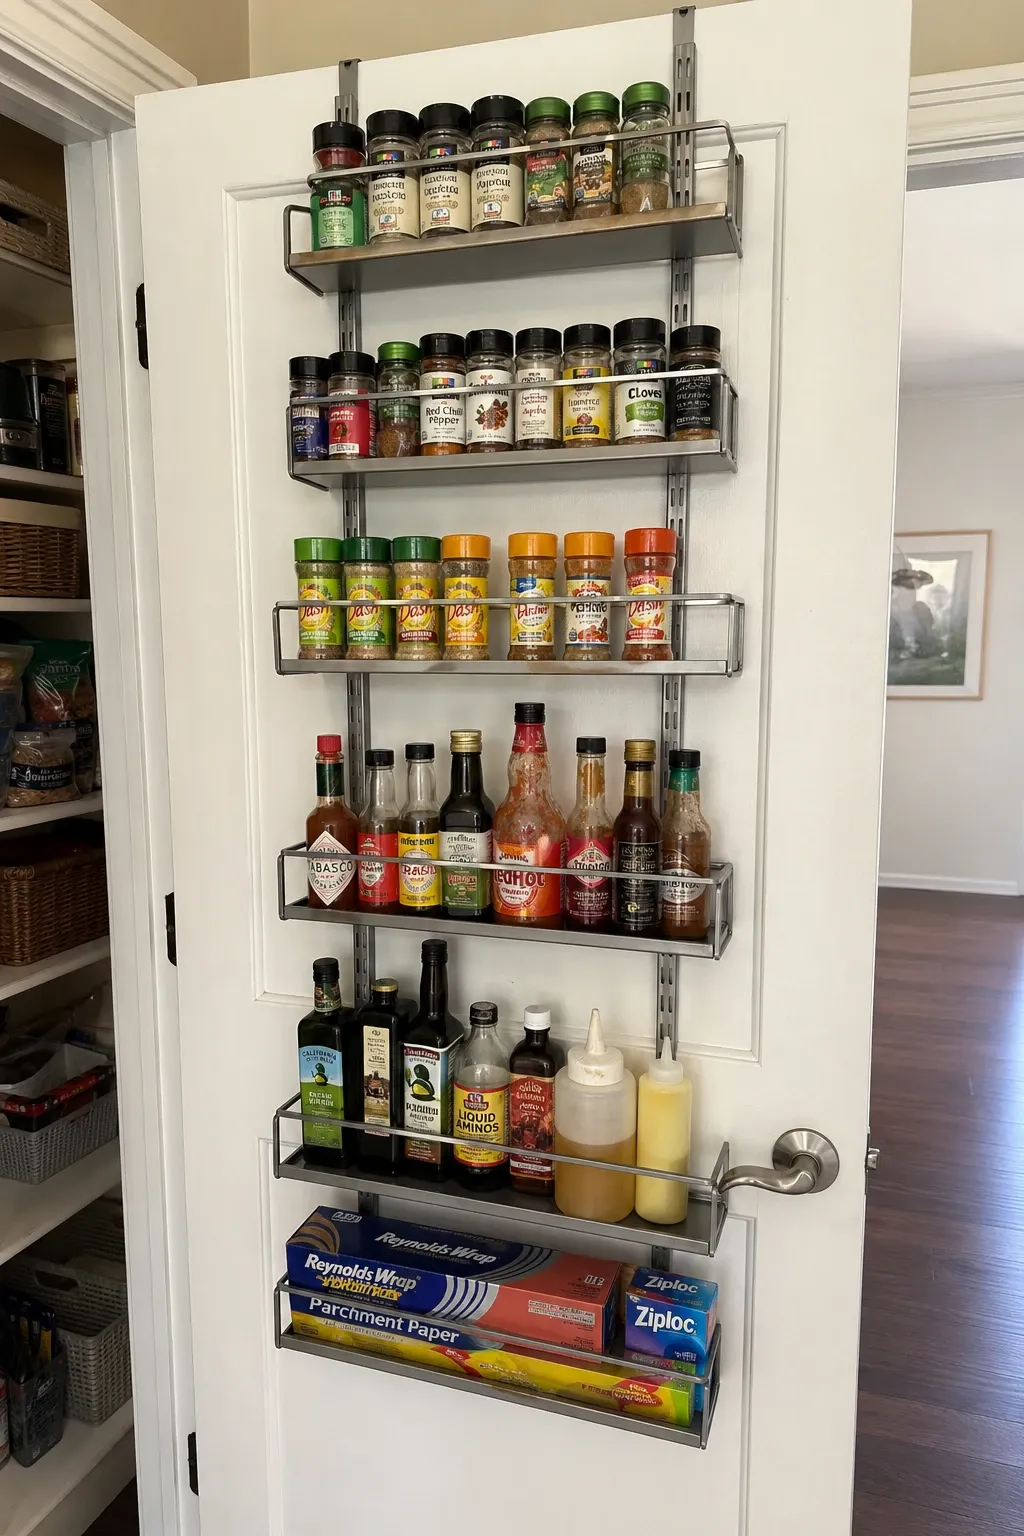
The back of the pantry door is free storage space that most people waste. An adjustable rack system with shelves or baskets mounted on the door holds spices, small jars, snack bars, and packets where you can see them at eye level. Adjustable racks let you change shelf heights to fit different sized items as your pantry contents change. The door opens and everything is right there, no digging through shelves required.
Designer Tip: Choose a door rack with a weight limit of at least 25 pounds. A fully loaded door rack is heavier than you expect, and cheap racks pull the screws out of the door over time. Heavy-duty racks with proper mounting hardware prevent that frustrating moment when the whole thing crashes to the floor.
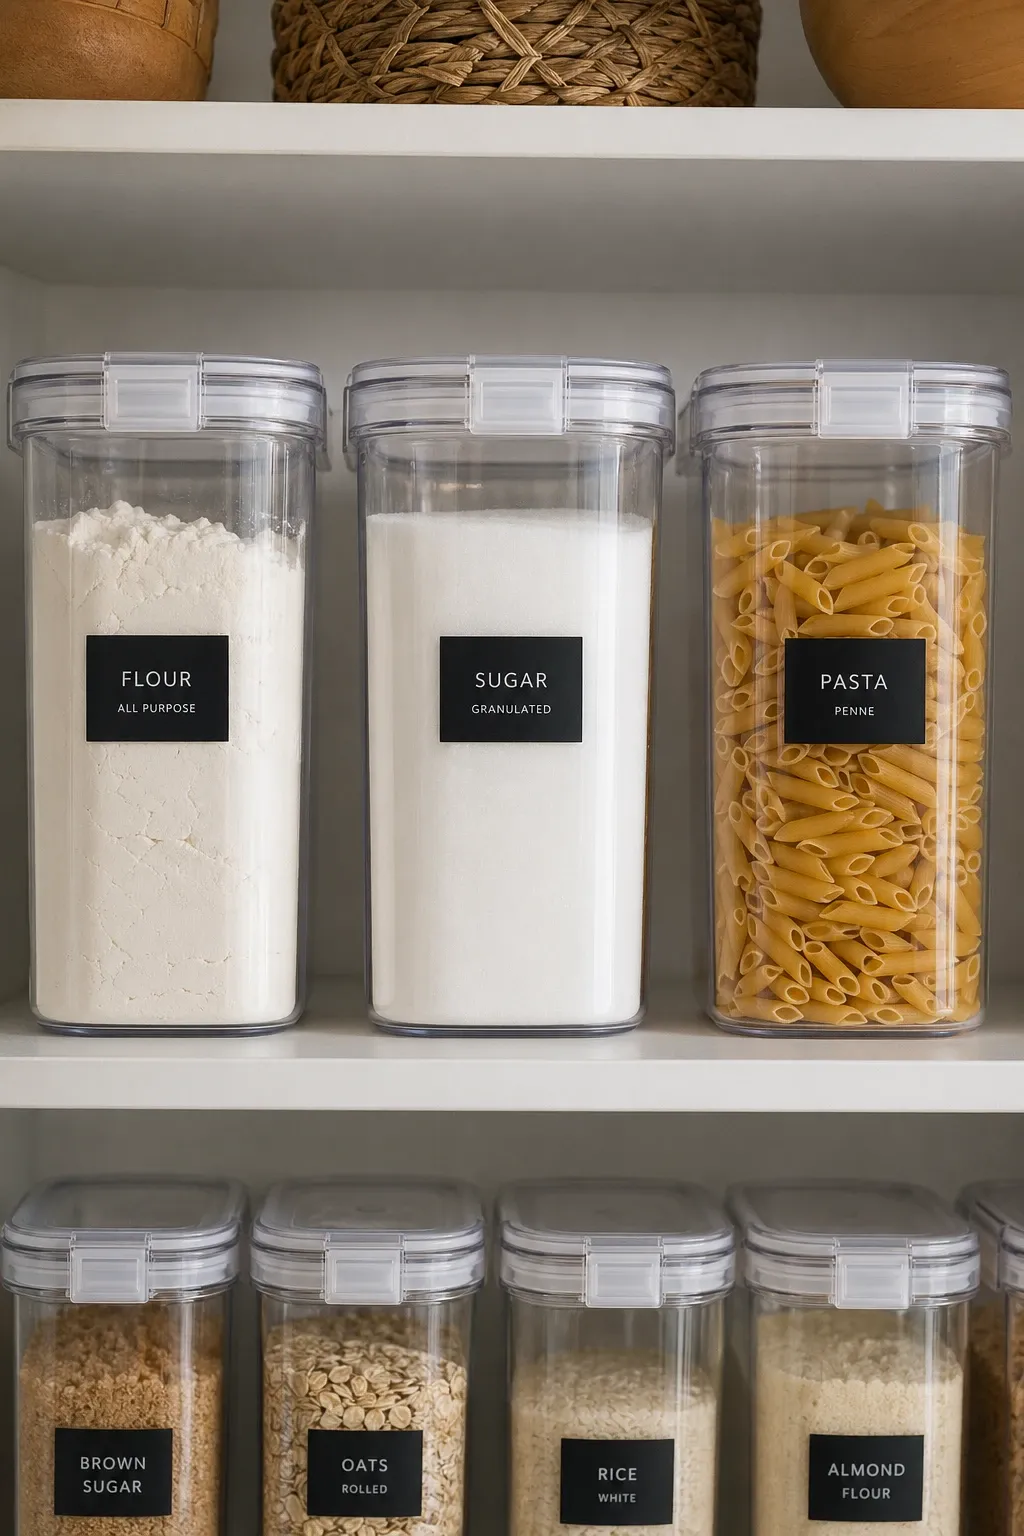
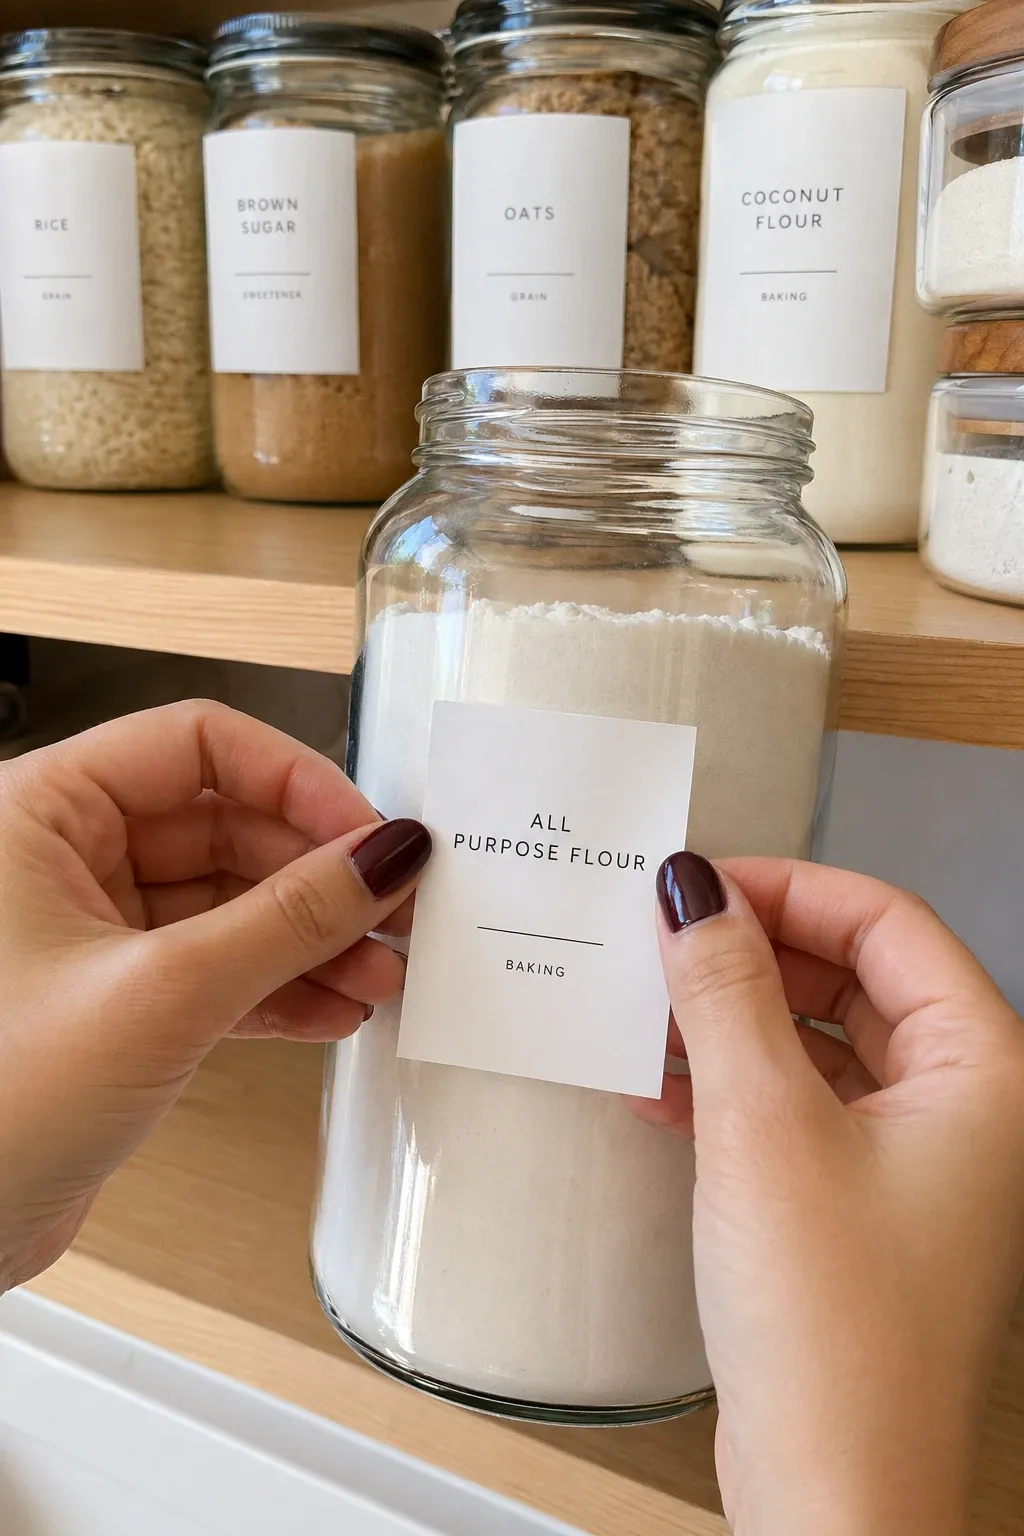
Matching airtight containers for flour, sugar, rice, pasta, and cereal keep food fresh longer and make the pantry look clean and organized. The uniform shape means containers stack and line up neatly on shelves with no wasted space between oddly shaped bags and boxes. Airtight seals keep bugs out and prevent the stale taste that happens when dry goods are exposed to air. This is the one pantry upgrade that makes the biggest visual and functional difference.
Designer Tip: Only decant items you use frequently enough to empty and refill regularly. Flour, sugar, rice, and cereal make sense. A bag of specialty lentils you use once a year does not. Be realistic about what you will actually maintain or the system breaks down fast.
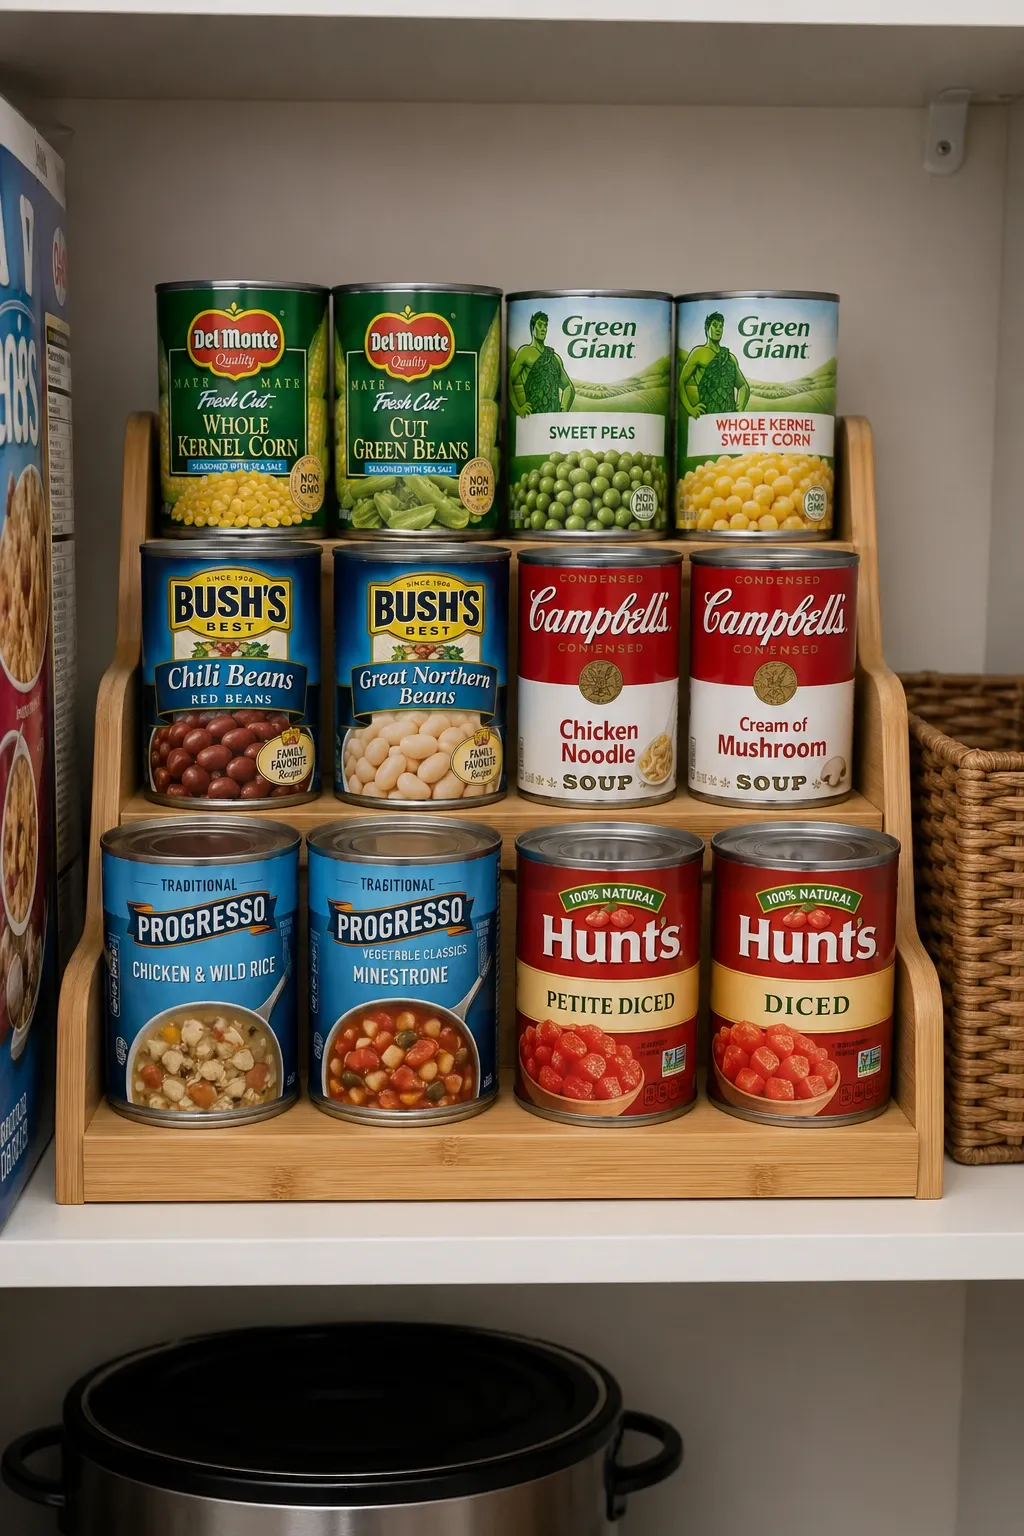
Tiered risers arrange canned goods on ascending steps so you can read every label without moving anything. Without risers, cans hide behind other cans and you end up buying duplicates of things you already have because you could not see them. A three-tier riser holds about 12 to 15 cans on a single shelf and makes the entire inventory visible at a glance. It is the most effective way to prevent the pantry version of losing things in the back of the fridge.
Designer Tip: Get risers with a non-slip surface so cans do not slide off when you pull one from the front. Smooth metal risers let cans roll forward and crash into each other every time you remove one. A textured or rubberized surface keeps everything in place.
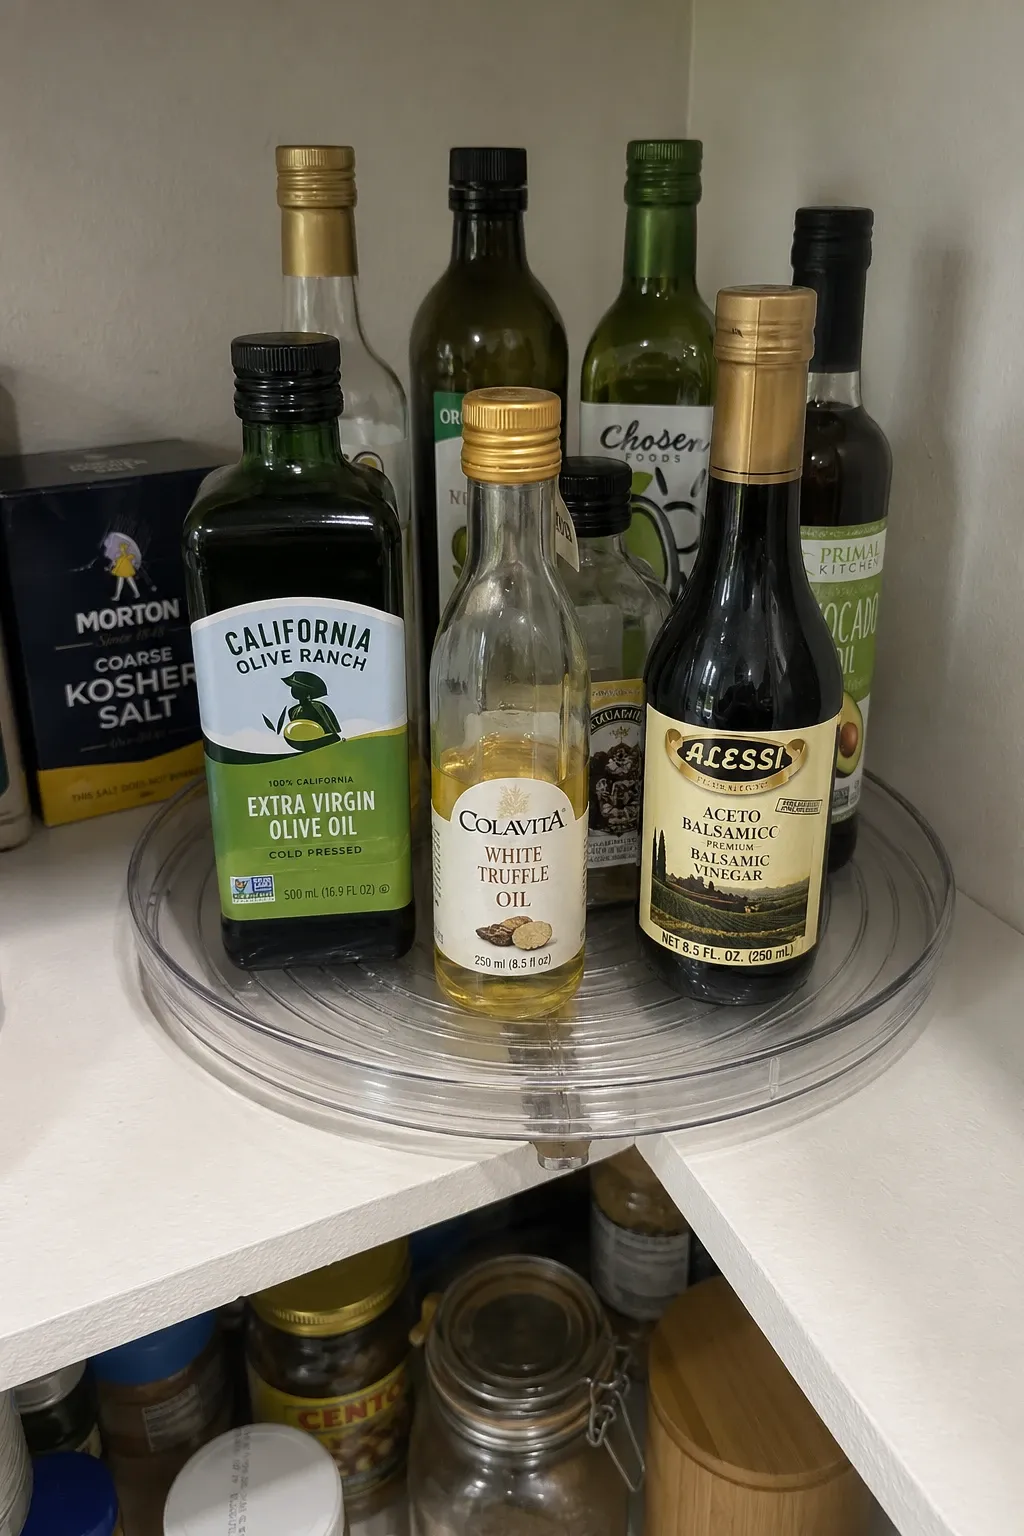
A lazy Susan on a deep pantry shelf brings back items to the front with a spin. Deep shelves are the worst for organization because items get pushed to the back and forgotten. Oils, vinegars, sauces, and condiments all work well on a turntable because you spin to find what you need and grab it. No more reaching past five bottles to get the one in the back corner.
Designer Tip: Use a two-tier lazy Susan if the shelf height allows it. The upper tier holds shorter items like spice jars and the lower tier holds taller bottles. This doubles the capacity of one turntable and keeps different sized items from blocking each other.
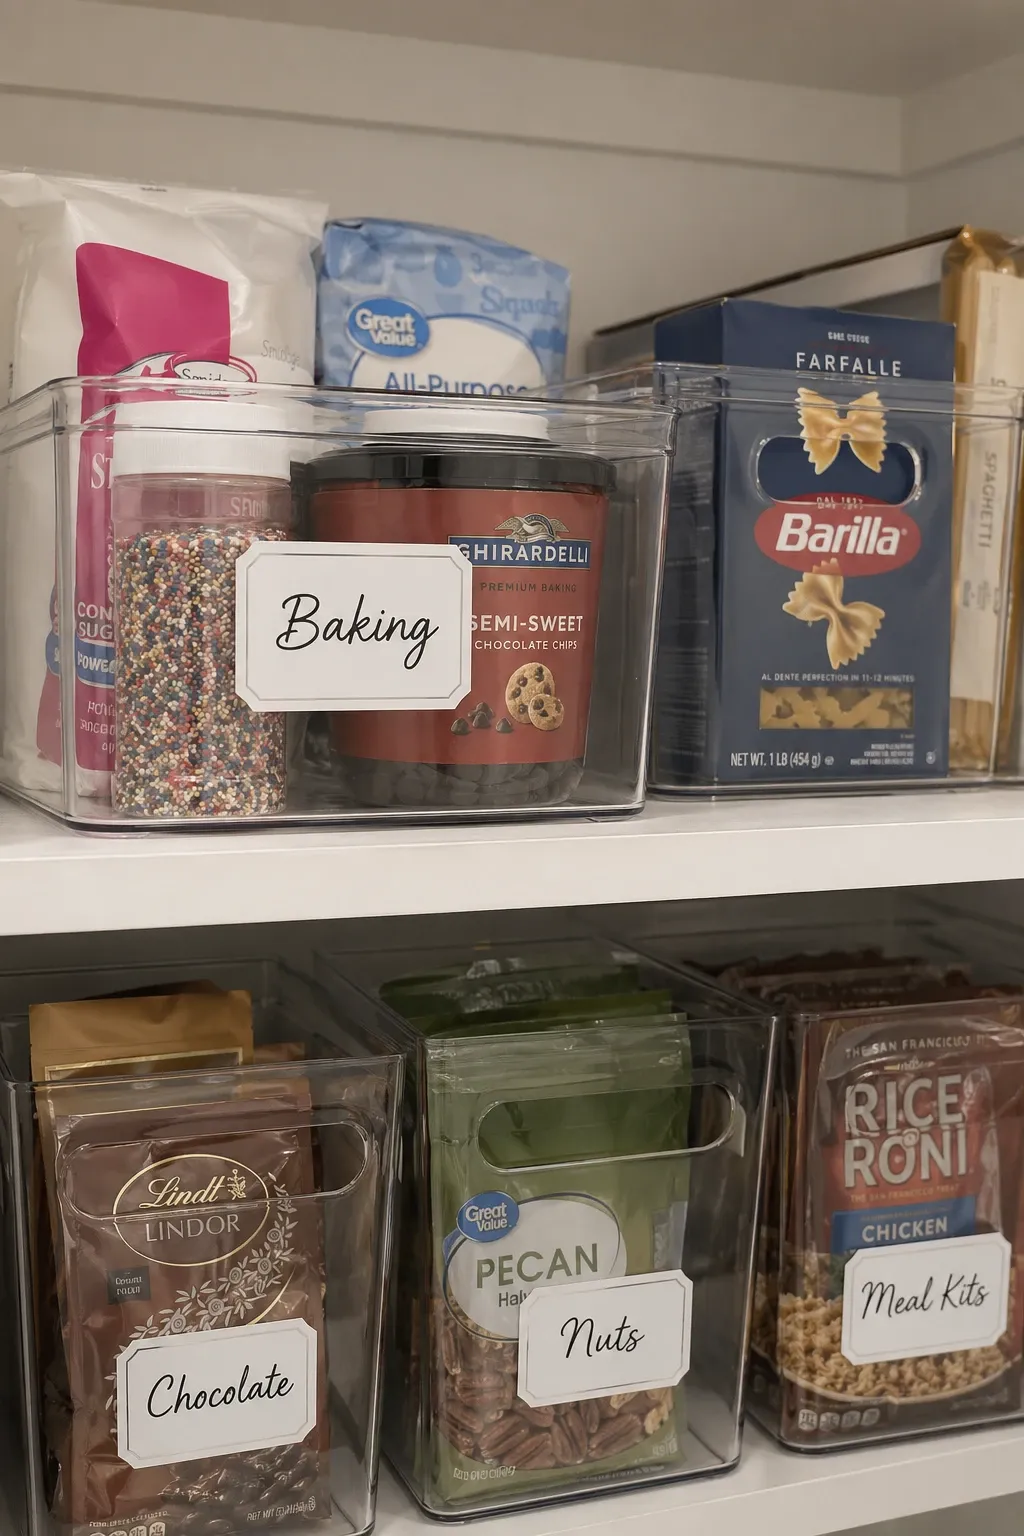
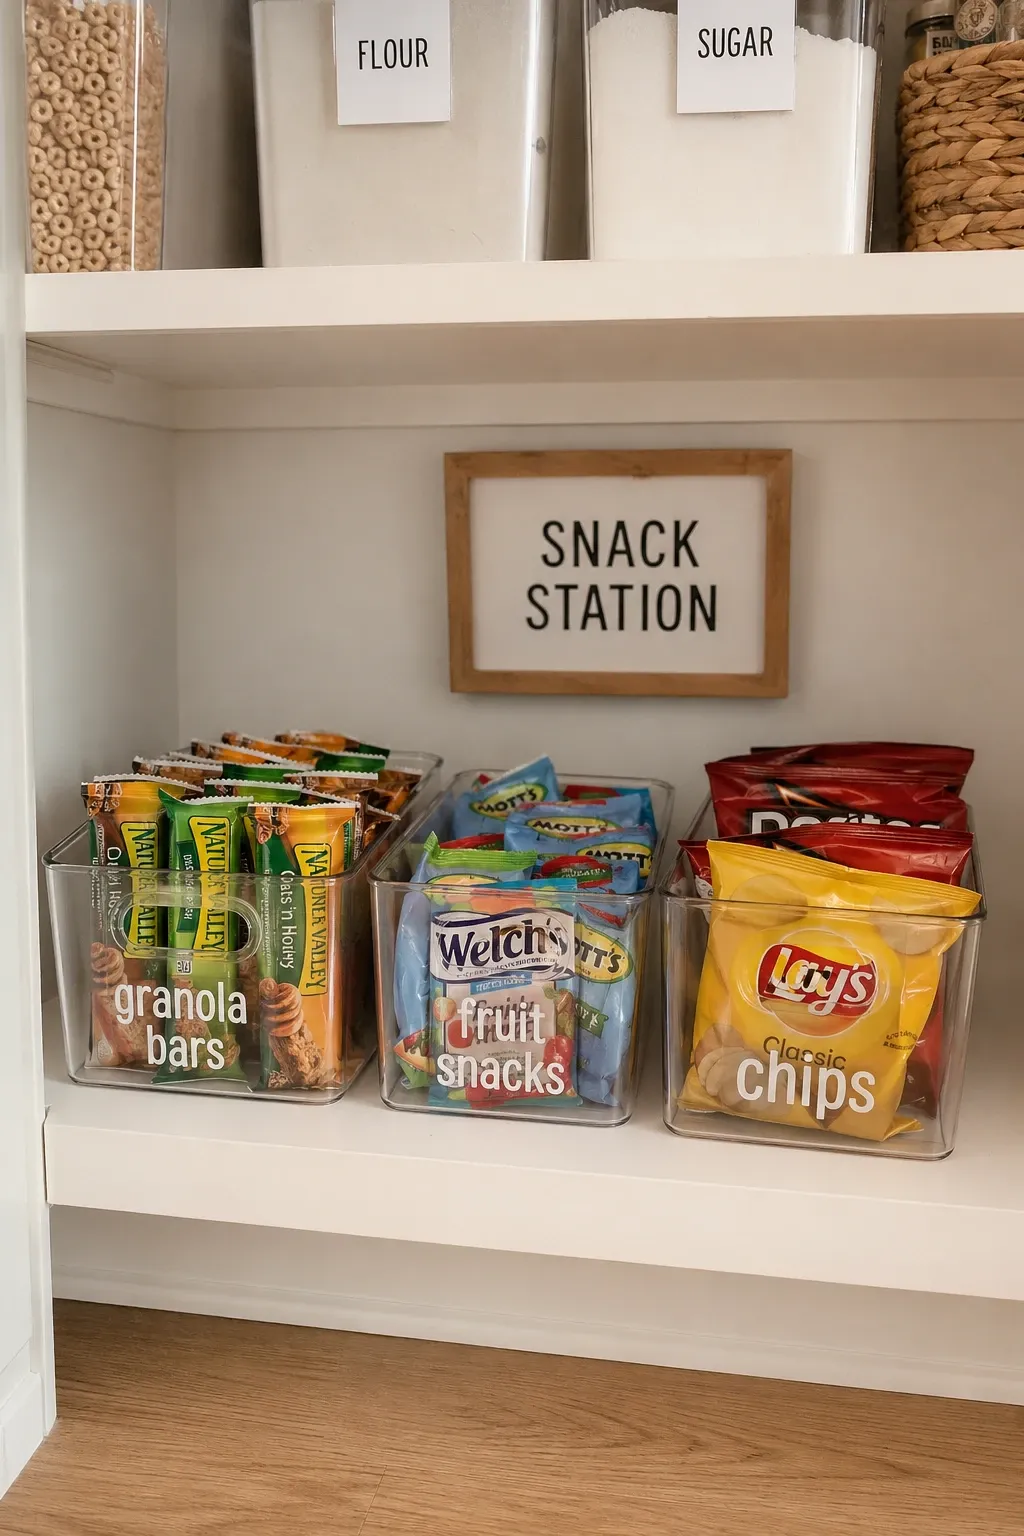
Clear bins group similar items together and let you see what is inside from any angle. One bin for snacks, one for baking supplies, one for breakfast items. Pull the whole bin out like a drawer, find what you need, and slide it back. The bins keep categories contained so different types of food do not mix together on the shelf. When a bin looks empty, you know it is time to restock that category.
Designer Tip: Buy all your bins from the same brand so the dimensions are consistent and they line up perfectly on the shelf. Mixing brands means mixing widths and heights, which creates gaps and a messy look. Consistent sizing is what makes the pantry look intentional.
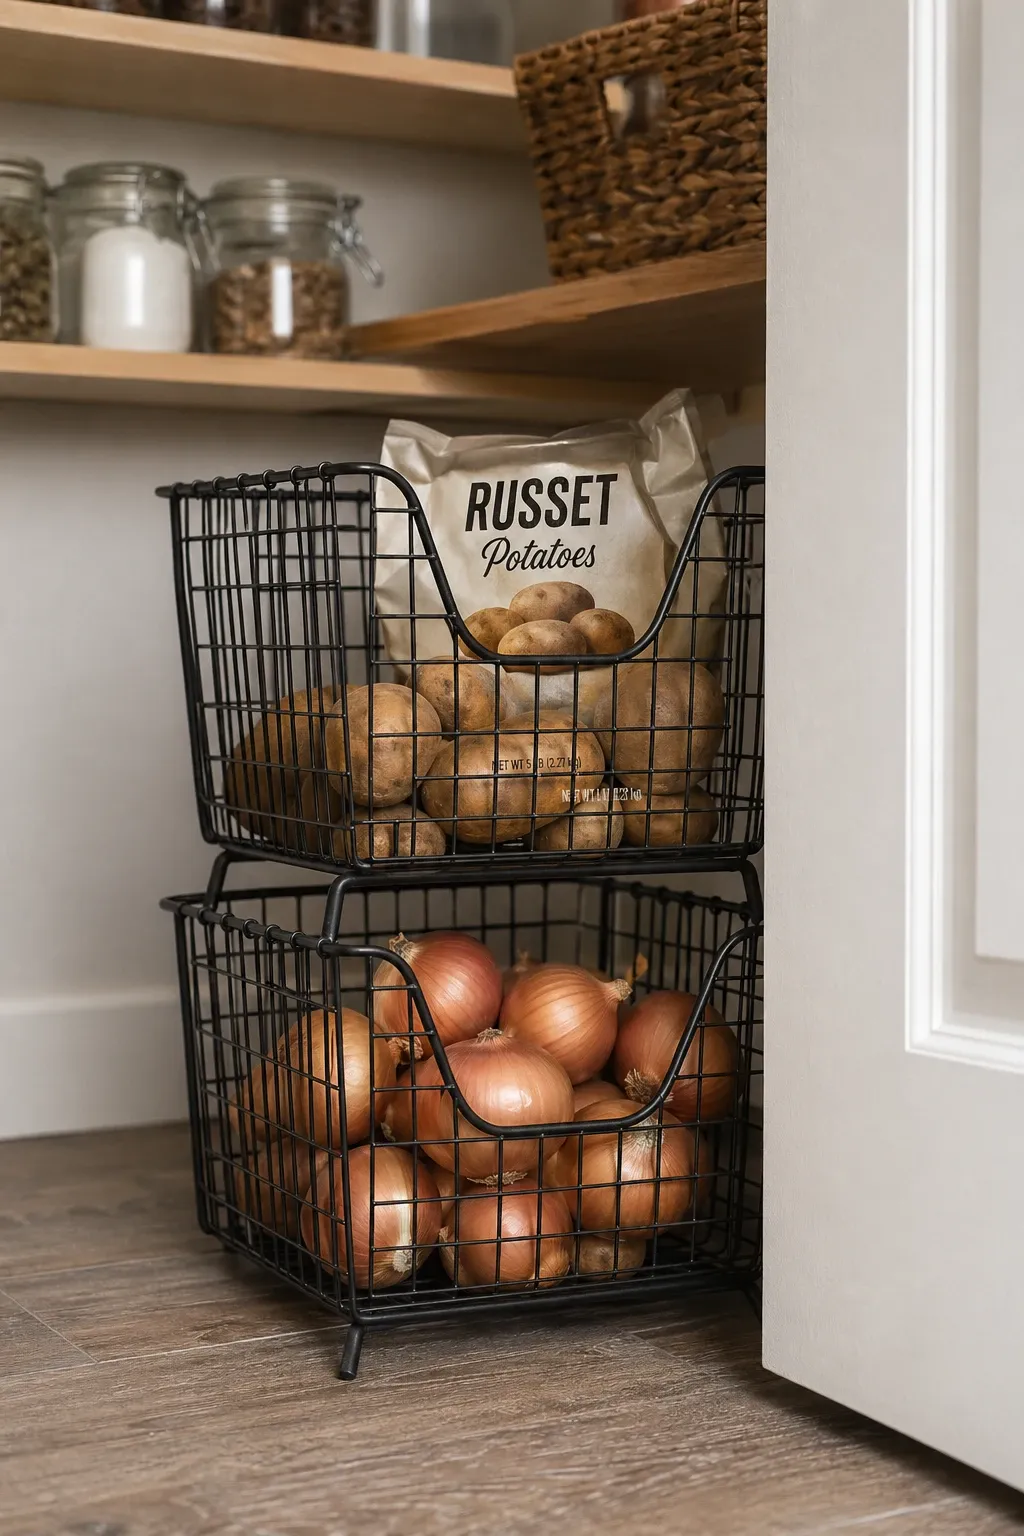
Wire baskets that stack on top of each other are ideal for storing potatoes, onions, garlic, and other items that need air circulation. The open wire lets air flow around the produce, which prevents the moisture buildup that causes rot in closed containers. Stackable baskets use vertical space efficiently and keep root vegetables separated so the ethylene gas from onions does not speed up sprouting in nearby potatoes.
Designer Tip: Line the bottom of each wire basket with a piece of newspaper or paper towel to catch dirt and make cleanup easier. Root vegetables shed soil over time, and a liner keeps the shelf underneath clean without blocking airflow through the sides of the basket.
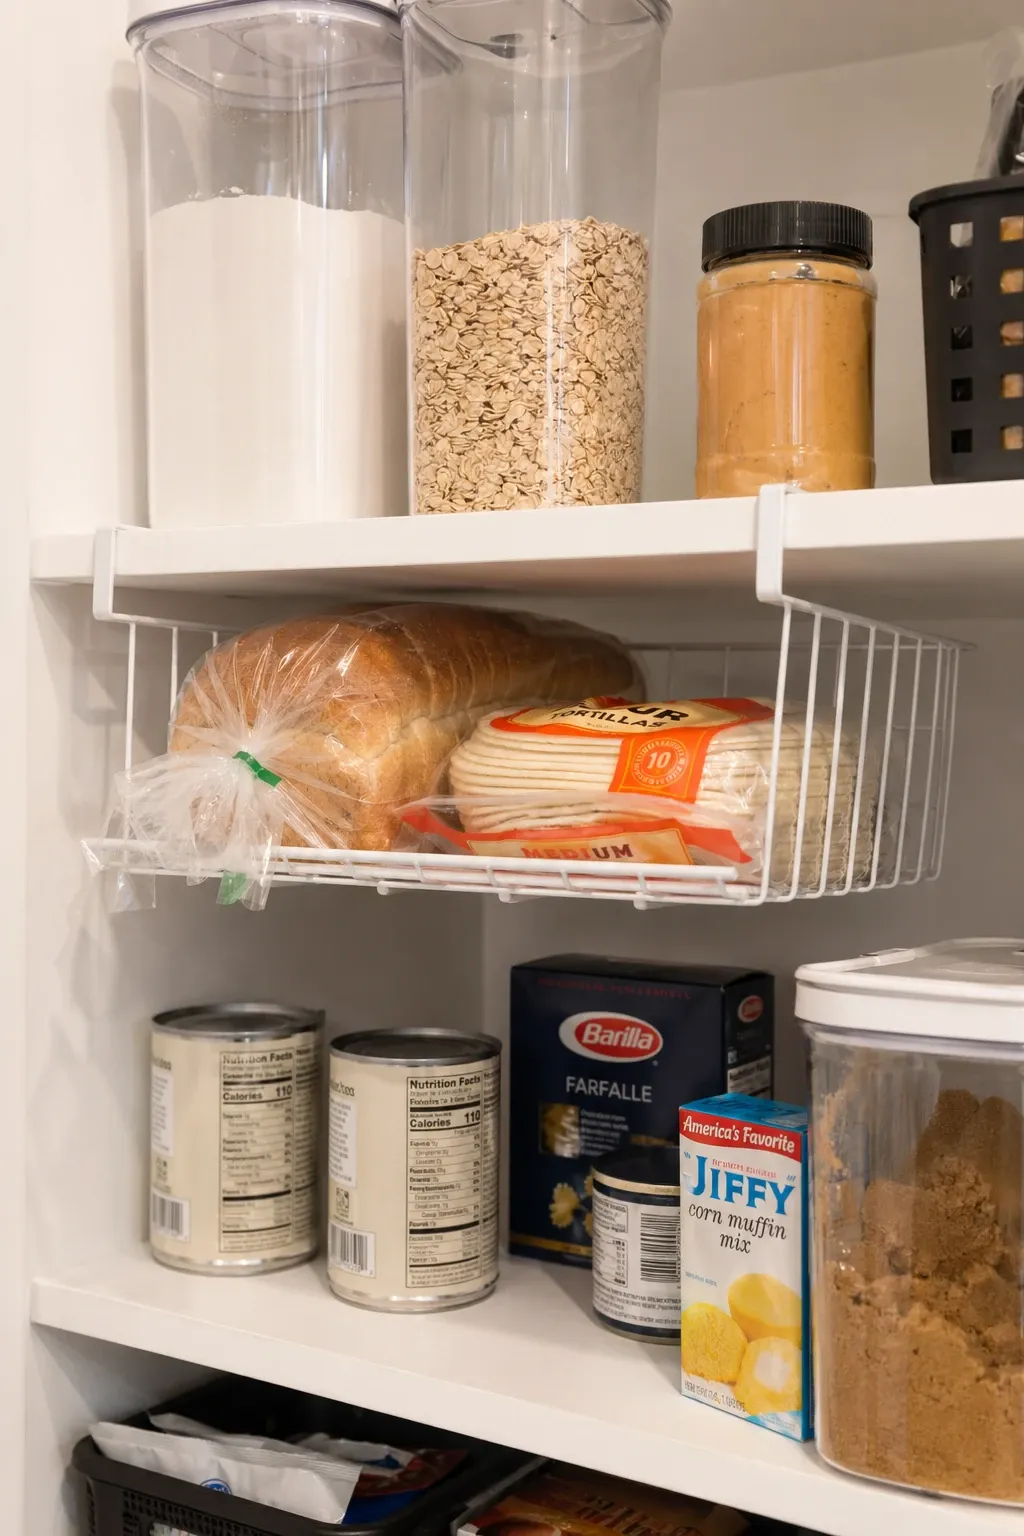
Wire baskets that hook onto the underside of a shelf use the dead air between two shelves for extra storage. They hold flat items like granola bars, tea boxes, or packets of seasoning mix that would otherwise get lost behind taller items on the shelf. The basket hangs from the shelf above and creates a new storage layer without taking any shelf space. It is free storage that was hiding in plain sight.
Designer Tip: Use shallow baskets, about two to three inches deep, so they do not hang down and block the items on the shelf below. A deep hanging basket eats into the usable height of the next shelf down, which creates a new problem while solving the old one.
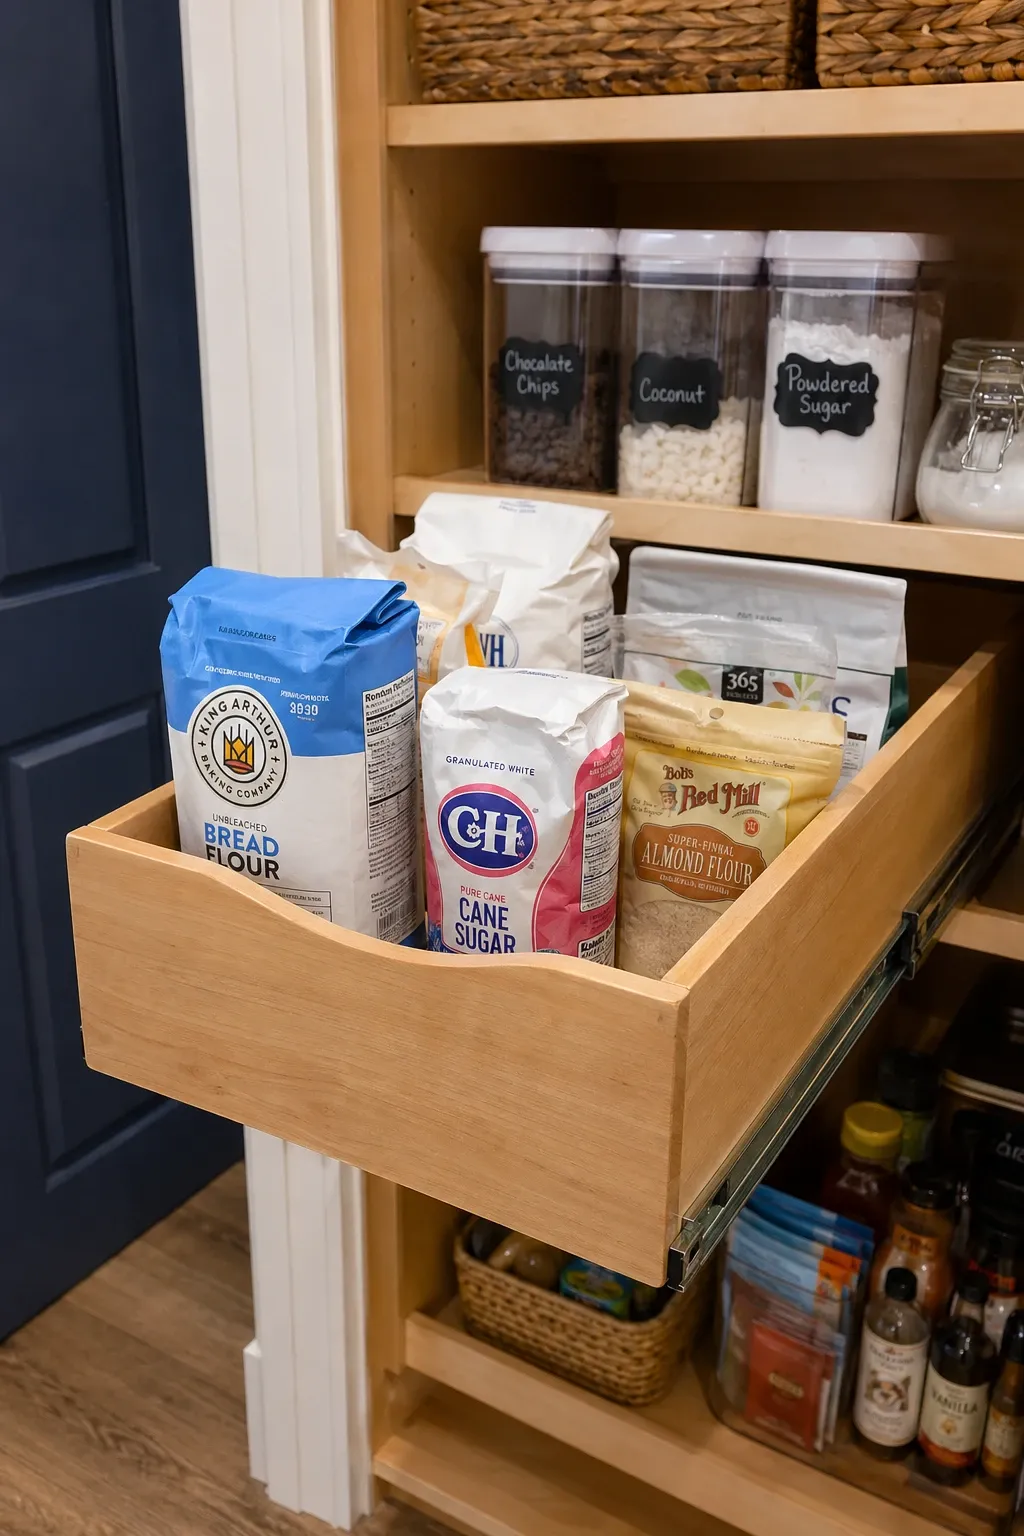
Pull-out drawers or sliding bins mounted on shelf tracks turn fixed shelves into accessible drawers. Pull the drawer out and the back of the shelf comes to you. This is the best solution for deep pantry shelves where items disappear into the back. Heavy items like canned goods and jars are especially easier to access on a sliding drawer rather than being lifted out of a deep shelf one at a time.
Designer Tip: Install full-extension slides so the drawer pulls all the way out of the pantry. Partial-extension slides leave the back third of the drawer hidden inside the shelf, which only partially solves the visibility problem. Full extension is worth the extra cost.
A clearly labeled snack bin or a dedicated snack shelf keeps all the grab-and-go items in one spot. Kids and adults both know exactly where to look when they want a snack, which prevents the rummaging that messes up the rest of the pantry. Stock it with granola bars, fruit snacks, crackers, and trail mix. When the bin is empty, it is time to restock. This one zone prevents most of the daily pantry chaos in households with kids.
Designer Tip: Put the snack zone at a height kids can reach themselves. If they have to ask you to get snacks, the zone does not work. Place it on a lower shelf where the youngest family member can grab what they need independently.
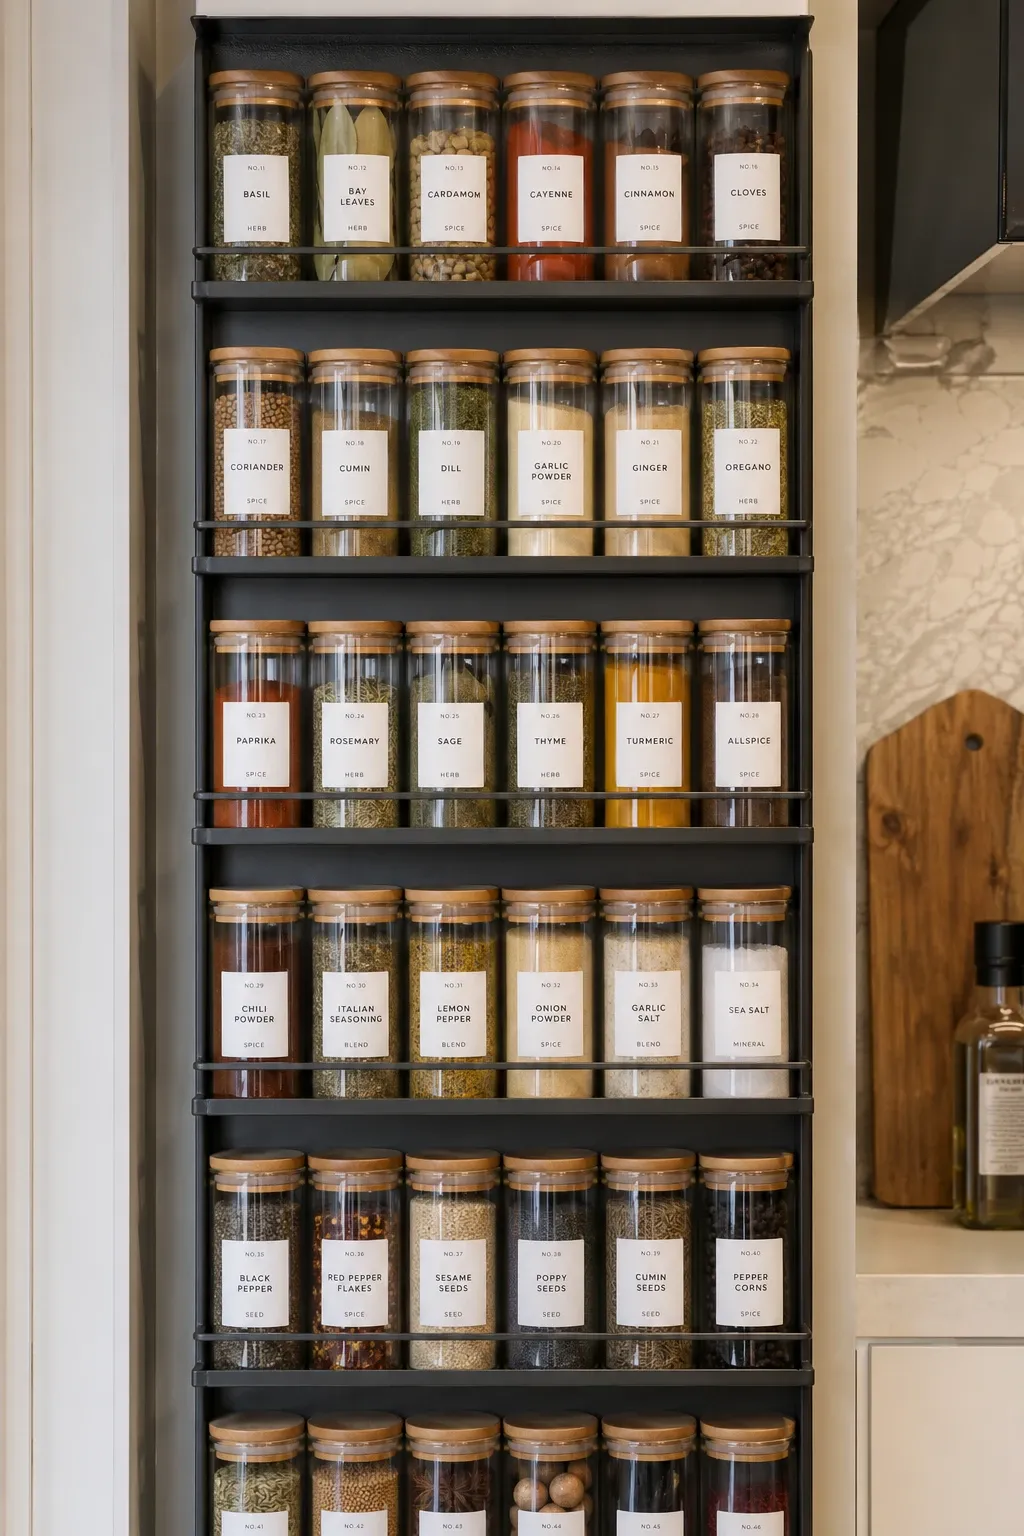
A tiered spice organizer that steps upward like a small staircase lets you see every spice jar at once. Without a tier, spice jars hide behind each other and you waste time hunting for the one you need while something is burning on the stove. A three or four-tier step holds 20 to 30 jars and fits on a standard pantry shelf. Alphabetize the spices on the tiers and you will find any spice in seconds.
Designer Tip: Transfer spices into uniform jars with matching labels for the cleanest look. Mismatched containers from different brands create visual chaos. Uniform jars with printed or handwritten labels on a tiered organizer look like a professional kitchen setup.
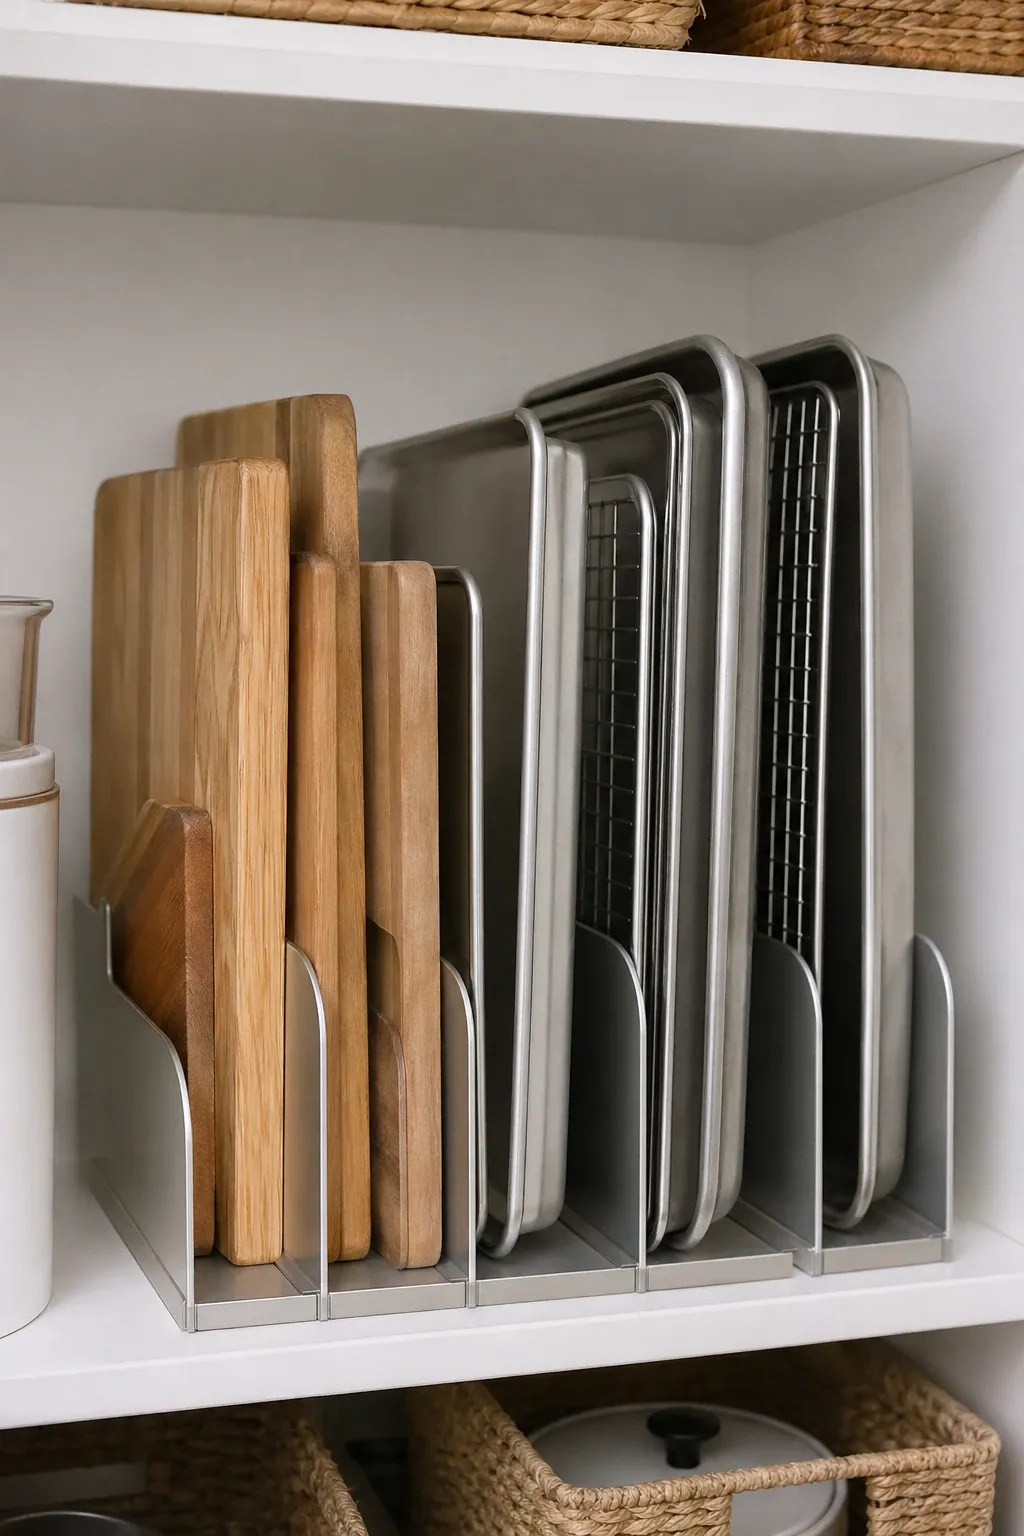
A vertical divider rack stores baking sheets, cutting boards, muffin tins, and cooling racks standing upright like books. Without a rack, these flat items get stacked horizontally and the one you need is always at the bottom of the pile. Vertical storage lets you slide any piece out without disturbing the others. A simple rack with U-shaped dividers on a lower shelf handles these awkward items better than any other method.
Designer Tip: Position the vertical rack on a lower shelf where you have the most height clearance. Baking sheets are tall when standing upright and need a shelf with at least 14 to 16 inches of vertical space to stand without tilting.
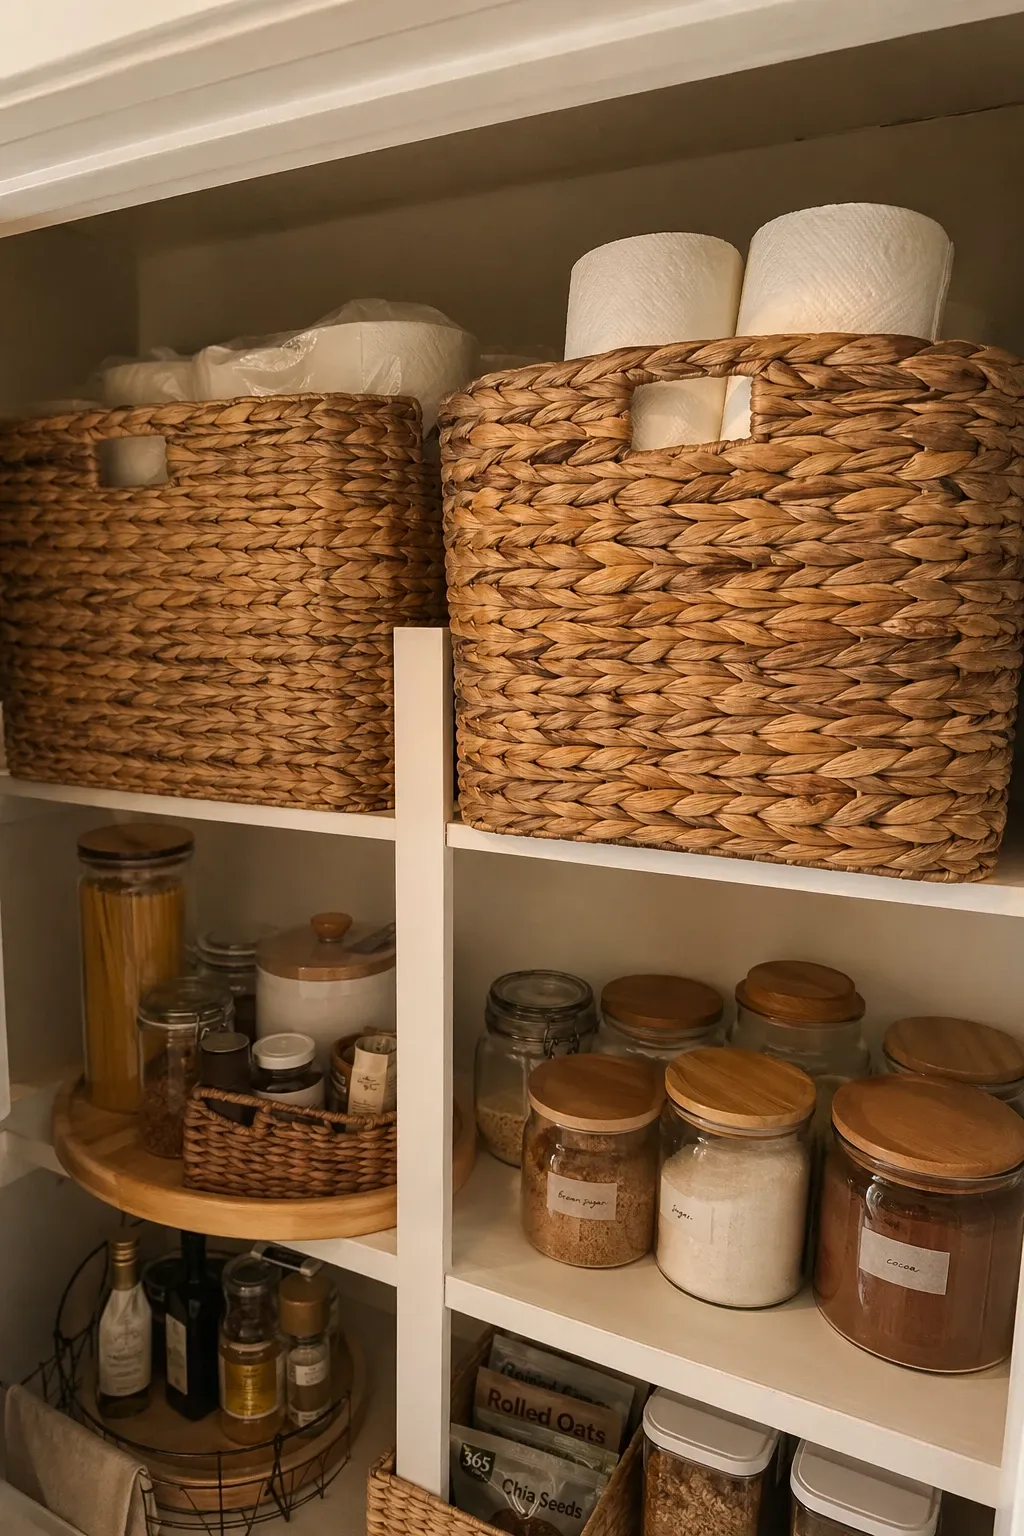
Woven baskets in seagrass, rattan, or bamboo add warmth and texture to a pantry that would otherwise look clinical with all clear bins and metal racks. Use them for bread, chips, produce, or any category where the rustic look fits the contents. The natural material breathes, which is good for items that need air circulation. Woven baskets also hide the visual clutter of partially opened bags and torn packaging behind a clean, natural exterior.
Designer Tip: Mix woven baskets with clear bins for the best of both worlds. Use clear bins for items where visibility matters, like canned goods and snacks, and woven baskets for items where hiding the mess matters more, like bags of chips and bread. The combination of textures makes the pantry look designed rather than sterile.
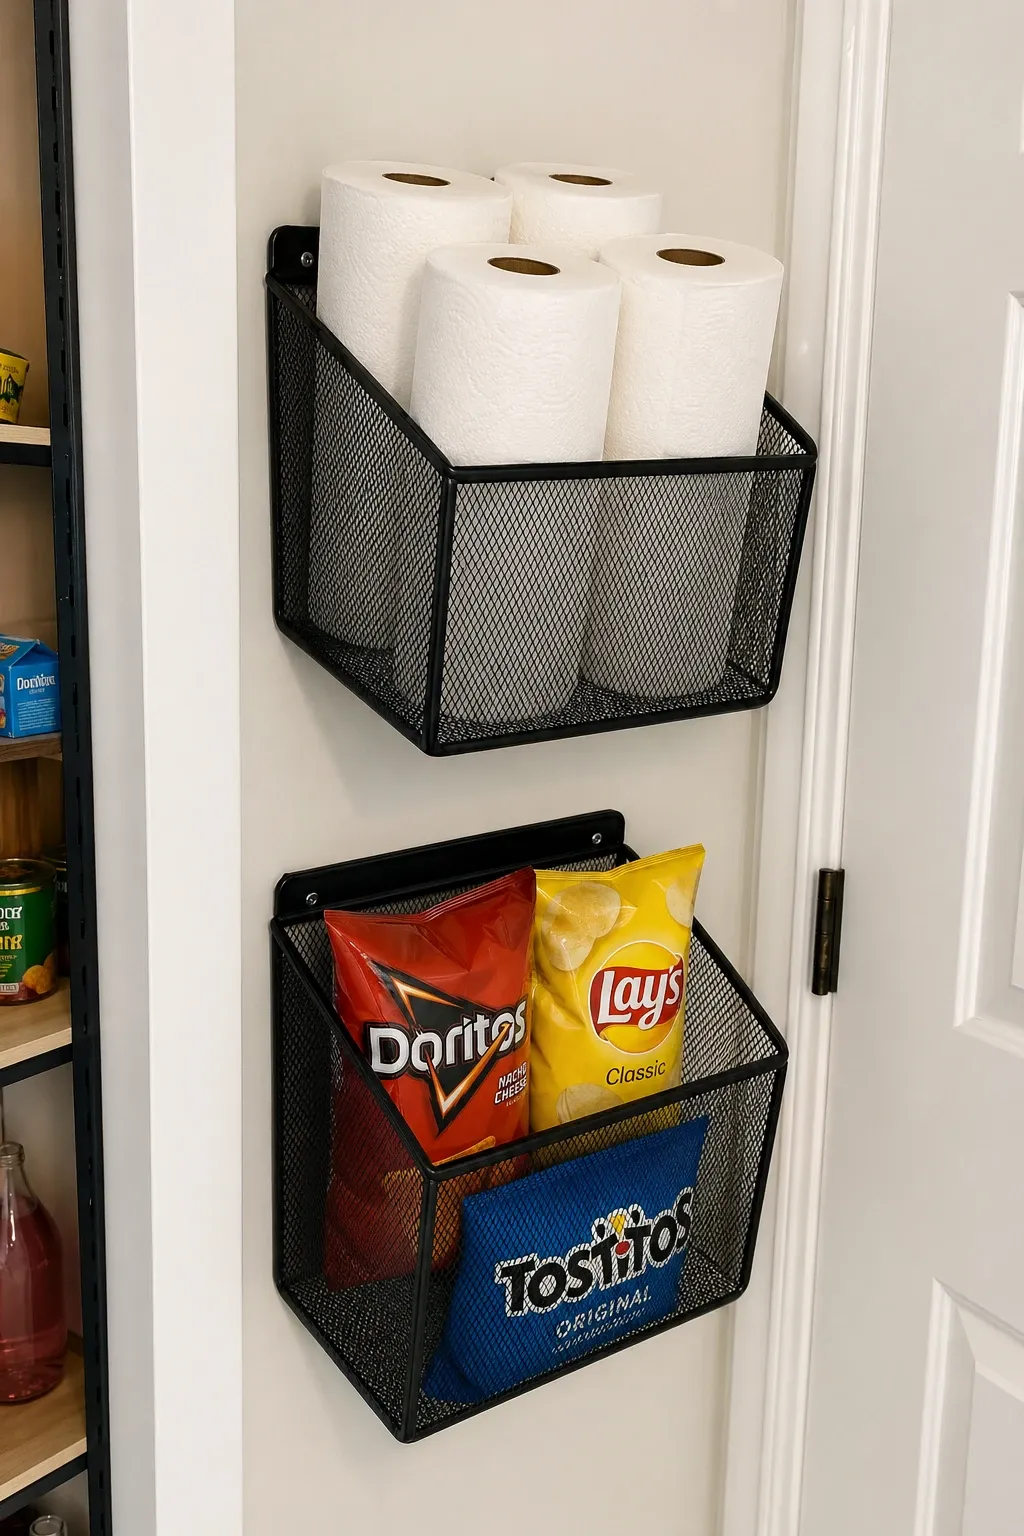
Metal mesh baskets screwed to the wall above or between shelves create floating storage spots for items that do not fit neatly on shelves. Fruits, small snacks, or packets of seasoning can go in wall baskets where they are visible and easy to grab. The mesh lets air circulate, which is especially good for fruit that needs to ripen. Wall baskets also free up shelf space for heavier, bulkier items that need a flat surface.
Designer Tip: Install baskets at different heights to create a staggered look that uses the wall efficiently. A row of three baskets at the same height wastes the vertical space above and below. Staggering them fills more of the wall and holds more items.
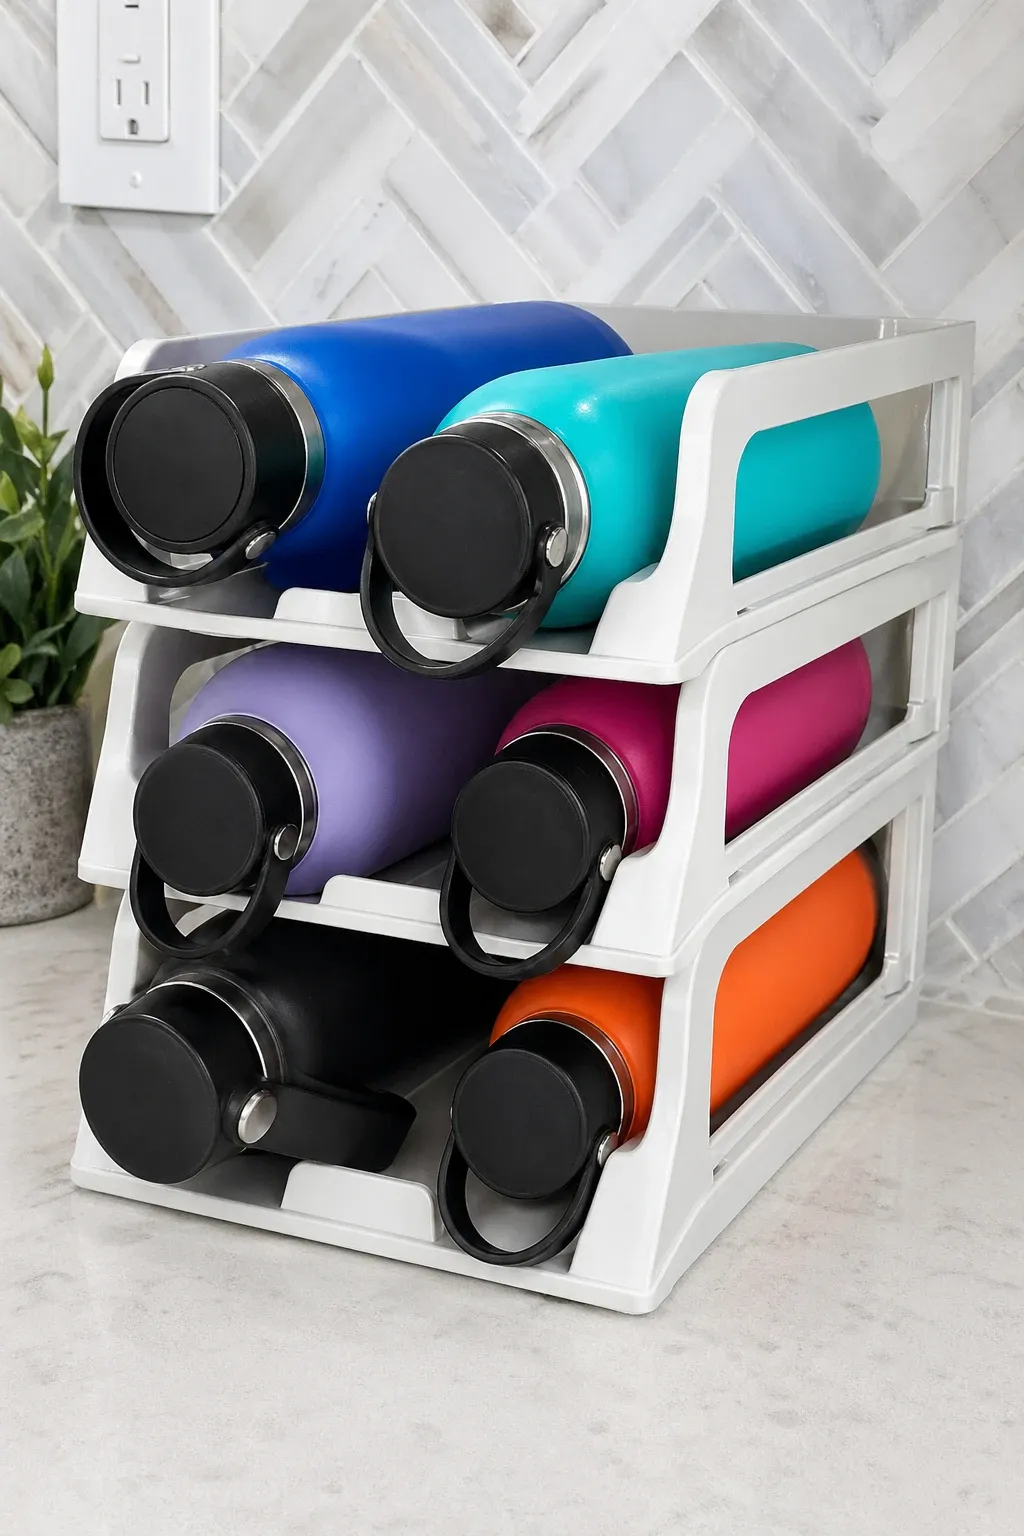
Water bottles, travel mugs, and thermoses are tall, tippy, and hard to organize on a flat shelf. A rack designed to hold them on their sides like wine bottles keeps them corralled and prevents the daily avalanche when you pull one out. Most racks hold six to ten bottles and fit on a standard pantry shelf. A separate section or clips for lids keeps the lids with their matching bottles, which solves the other half of the water bottle mess.
Designer Tip: Store bottles upside down or at a slight downward angle so any residual water drains out rather than sitting in the bottom and getting stale or growing mold. This is especially important for bottles that have been washed but not fully dried before being put away.
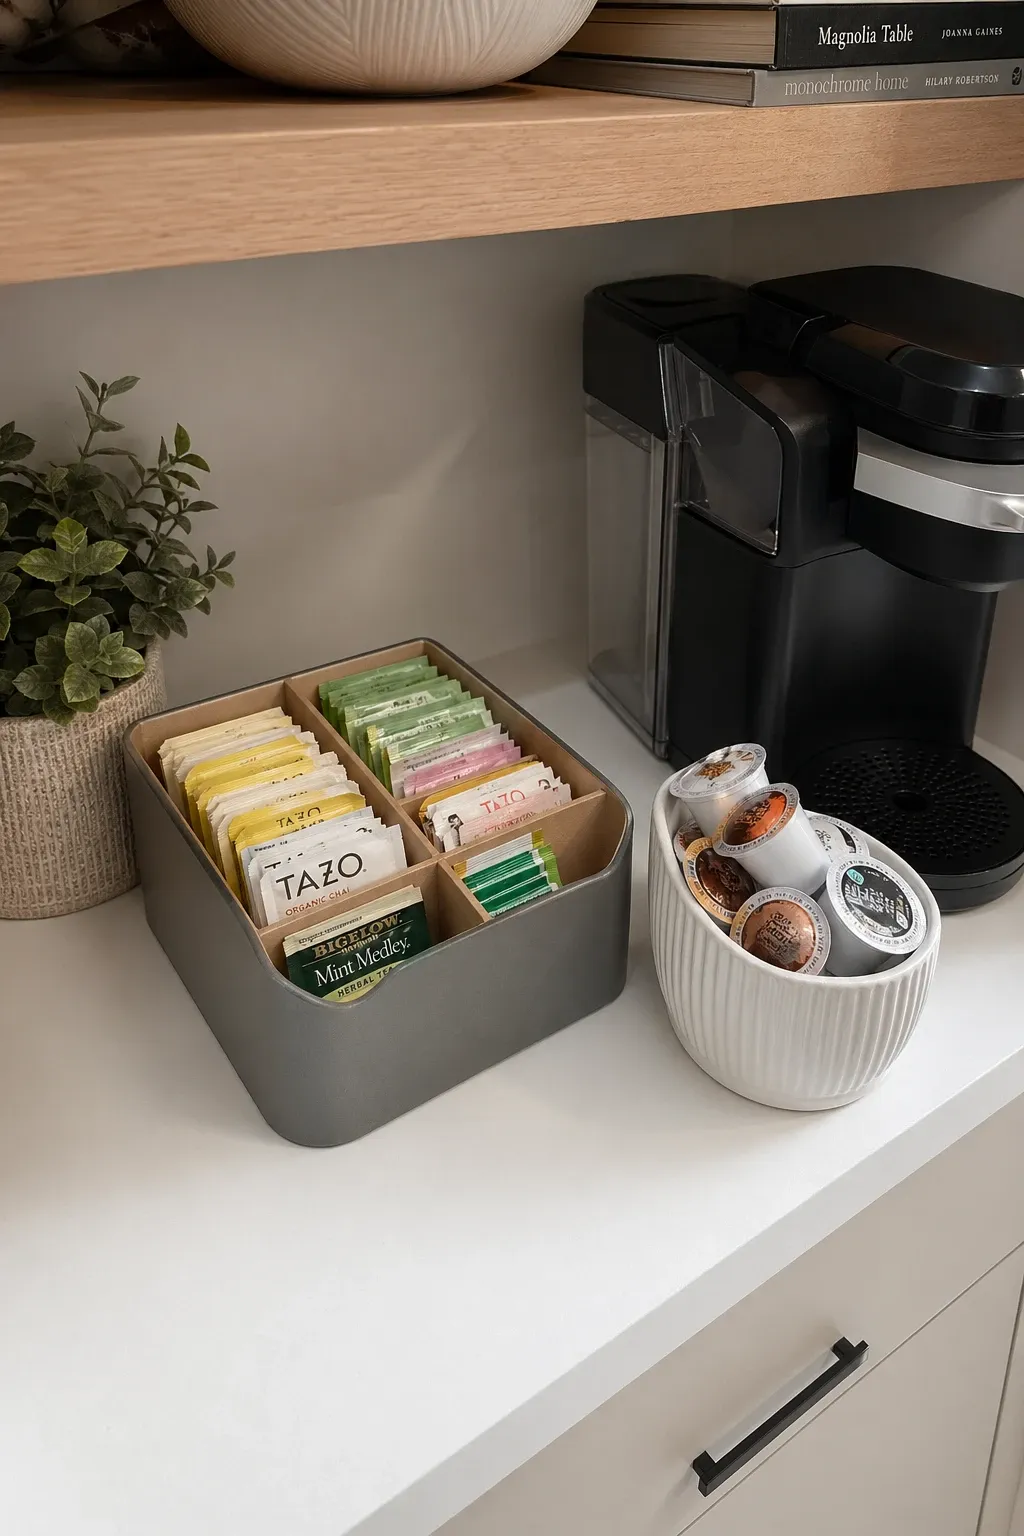
Grouping all coffee and tea supplies in one bin or on one dedicated shelf creates a morning station where everything you need is in one spot. Coffee beans or grounds, filters, tea bags, sweetener, and mugs all in one area means your morning routine does not involve opening five different cabinets. A bin with a handle makes it even easier because you can carry the whole station to the counter, make your drink, and slide it back.
Designer Tip: Store the coffee and tea station on a shelf at counter height so you can slide the bin straight from the pantry to the counter without lifting. A station stored on a high shelf that you have to reach up for every morning will not last as a habit.
Labels on every bin, container, and shelf zone are what keep a pantry organized after the initial setup. Without labels, people in the household put things wherever there is space, and the whole system falls apart within a week. Labels tell everyone exactly where each item goes, which means putting groceries away after shopping takes half the time and the organization holds. Chalkboard labels let you change the text as your categories shift.
Designer Tip: Use a label maker for a clean, consistent look, or handwritten chalkboard labels for a more casual, farmhouse style. The important thing is that every bin and container has a label. Style is secondary to the labels actually existing and being readable.
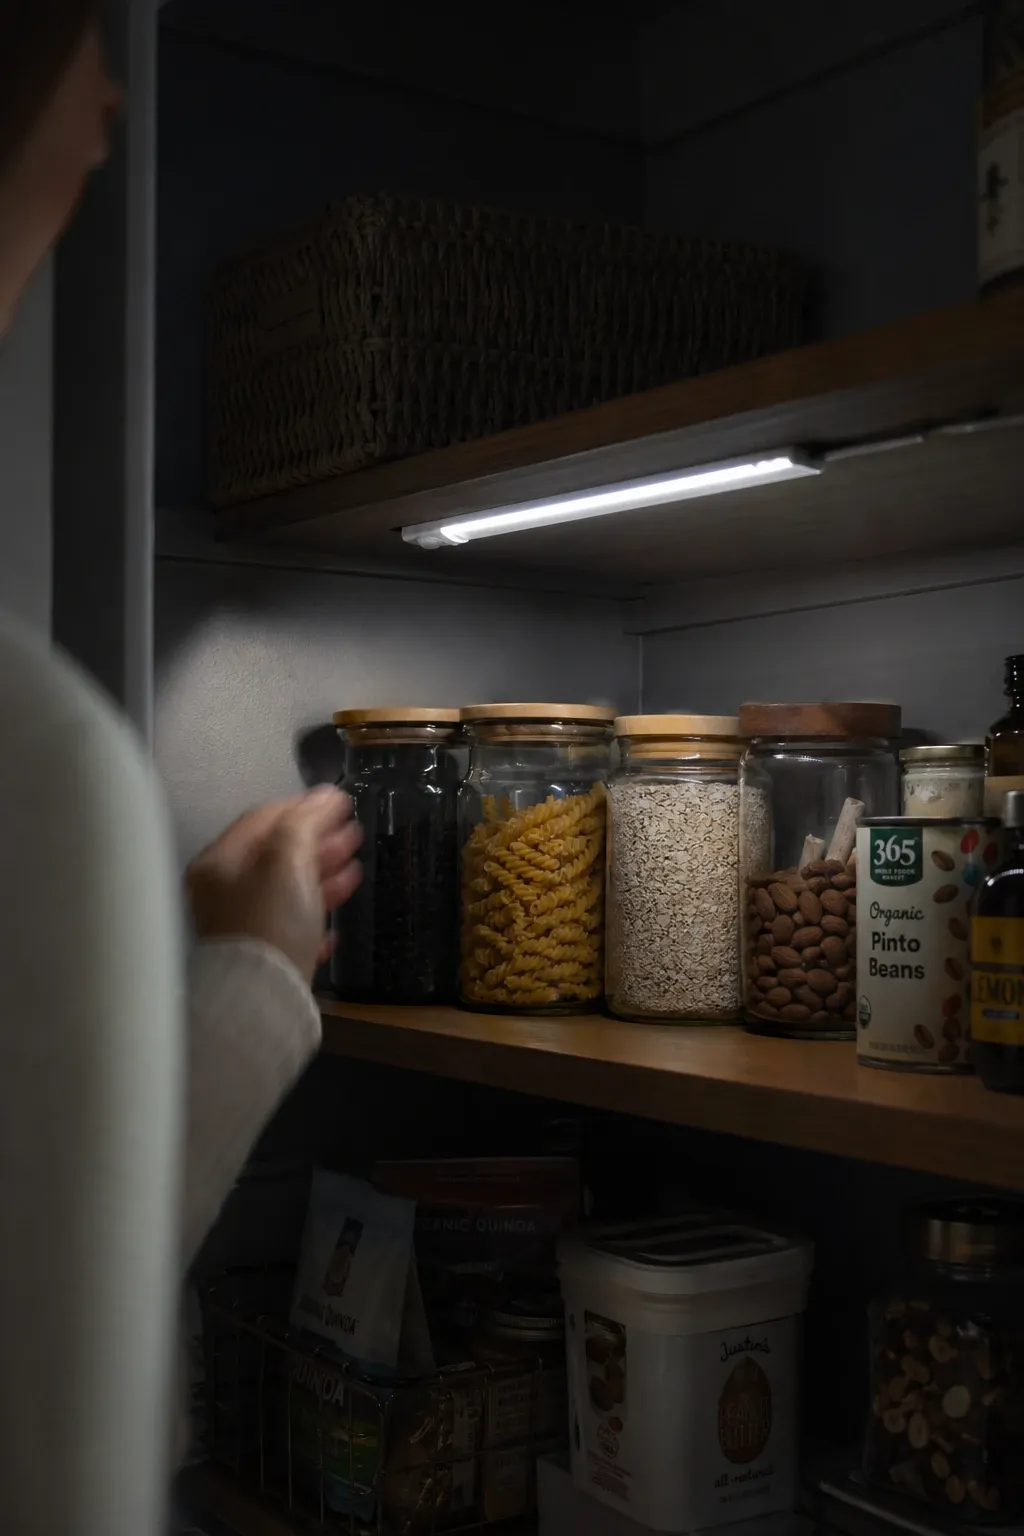
Battery-powered LED light strips with motion sensors light up the pantry automatically when you open the door or walk in. Dark pantries are hard to navigate and items in the shadows get overlooked. Stick-on LED strips on the underside of each shelf illuminate the shelf below and make every item visible. They turn on when they detect motion and turn off after 30 to 60 seconds of inactivity. No wiring, no electrician, just peel and stick.
Designer Tip: Use warm white LEDs rather than cool white. Warm light makes food look appealing and creates a pleasant atmosphere. Cool white LEDs make the pantry feel like a hospital supply closet. The color temperature makes a bigger difference than you would expect in a small enclosed space.
An organized pantry saves you time every day, reduces food waste because you can see what you have, and makes cooking less frustrating. Start with the two or three ideas from this list that address your biggest pain points and add more over time. The key is building a system that matches how your household actually uses the pantry, not how it looks on social media.
Frequently Asked Questions
How do I start organizing a messy pantry?
Take everything out, throw away expired items, and group what remains into categories like canned goods, snacks, baking supplies, breakfast items, and grains. Then put each category back on its own shelf or in its own bin. Add organizers for the specific problems you notice, like cans hiding behind each other or spices being impossible to find.
What should go on which pantry shelf?
Put everyday items at eye level where they are easiest to see and grab. Heavy items like bulk bags and canned goods go on lower shelves. Rarely used items, specialty ingredients, and backup stock go on the highest shelves. Snacks for kids go on a shelf they can reach without help.
Are airtight containers really necessary?
For items like flour, sugar, rice, cereal, and pasta, yes. Airtight containers keep food fresh longer, prevent pantry moths and other pests from getting in, and eliminate the clutter of half-open bags. For canned goods and sealed packages, the original packaging is fine.
How do I keep my pantry organized long term?
Labels are the single most important thing for long-term organization. When every item has a labeled home, everyone in the household knows where to put things back. Do a quick 10-minute pantry check once a week when you make your grocery list, and do a full cleanout once every three to four months.